Introduction: Why Lidar Needs Annotation
Lidar data without annotations is like a raw blueprint without labels — you see the structure, but none of the meaning. Whether you're training a self-driving car or monitoring a smart city, it’s the annotation that teaches machines to “see” what's going on in the world around them.
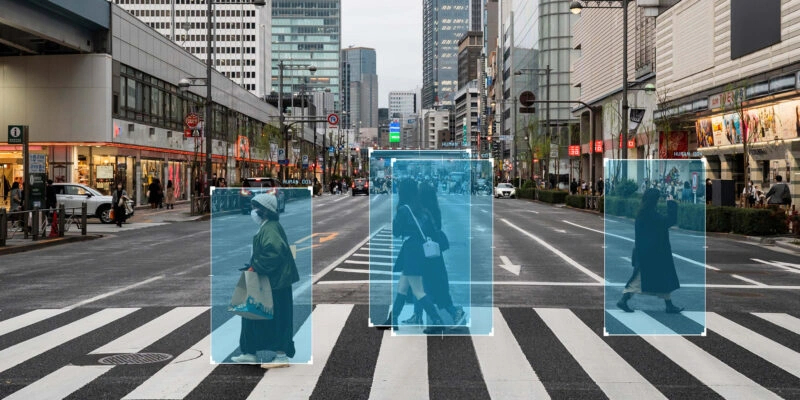
So what exactly are you teaching the machine? Where that pedestrian is standing. Which points represent a truck. How far away that wall is. And that’s where Lidar annotation steps in.
This guide breaks it all down — from what Lidar is, to how annotation works, to the best practices that ensure your AI doesn't just learn — but learns well.
What Is Lidar and How It Works
TL;DR: Lidar = lasers + geometry = 3D understanding.
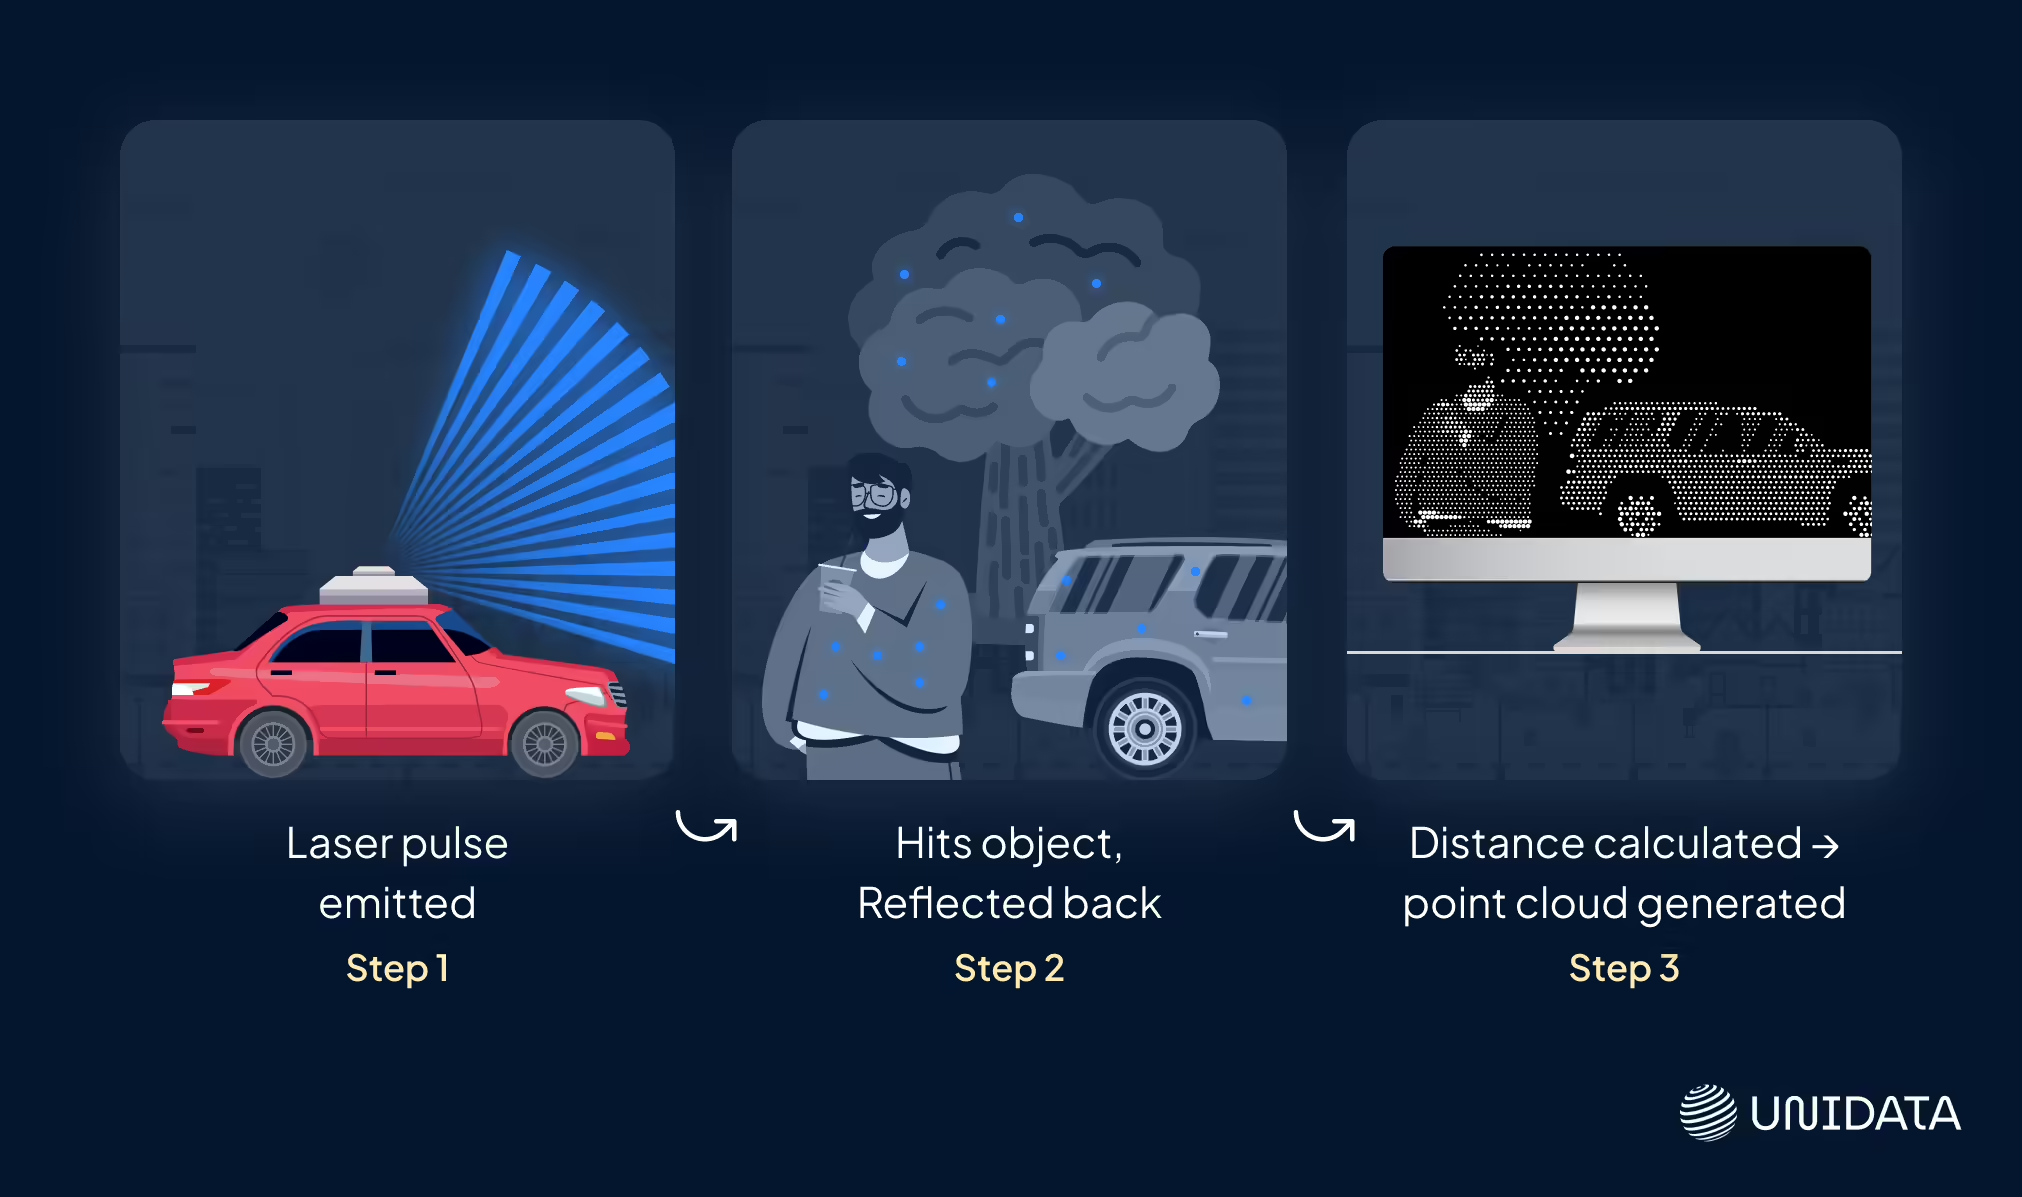
Imagine shining a flashlight into the dark and measuring how long it takes for the beam to bounce back from whatever it hits. Now crank that up to 300,000 pulses per second, swap the flashlight for a laser, and you’ve got yourself Lidar.
Lidar (short for Light Detection and Ranging) is like giving machines super-precise 3D vision. It works like this:
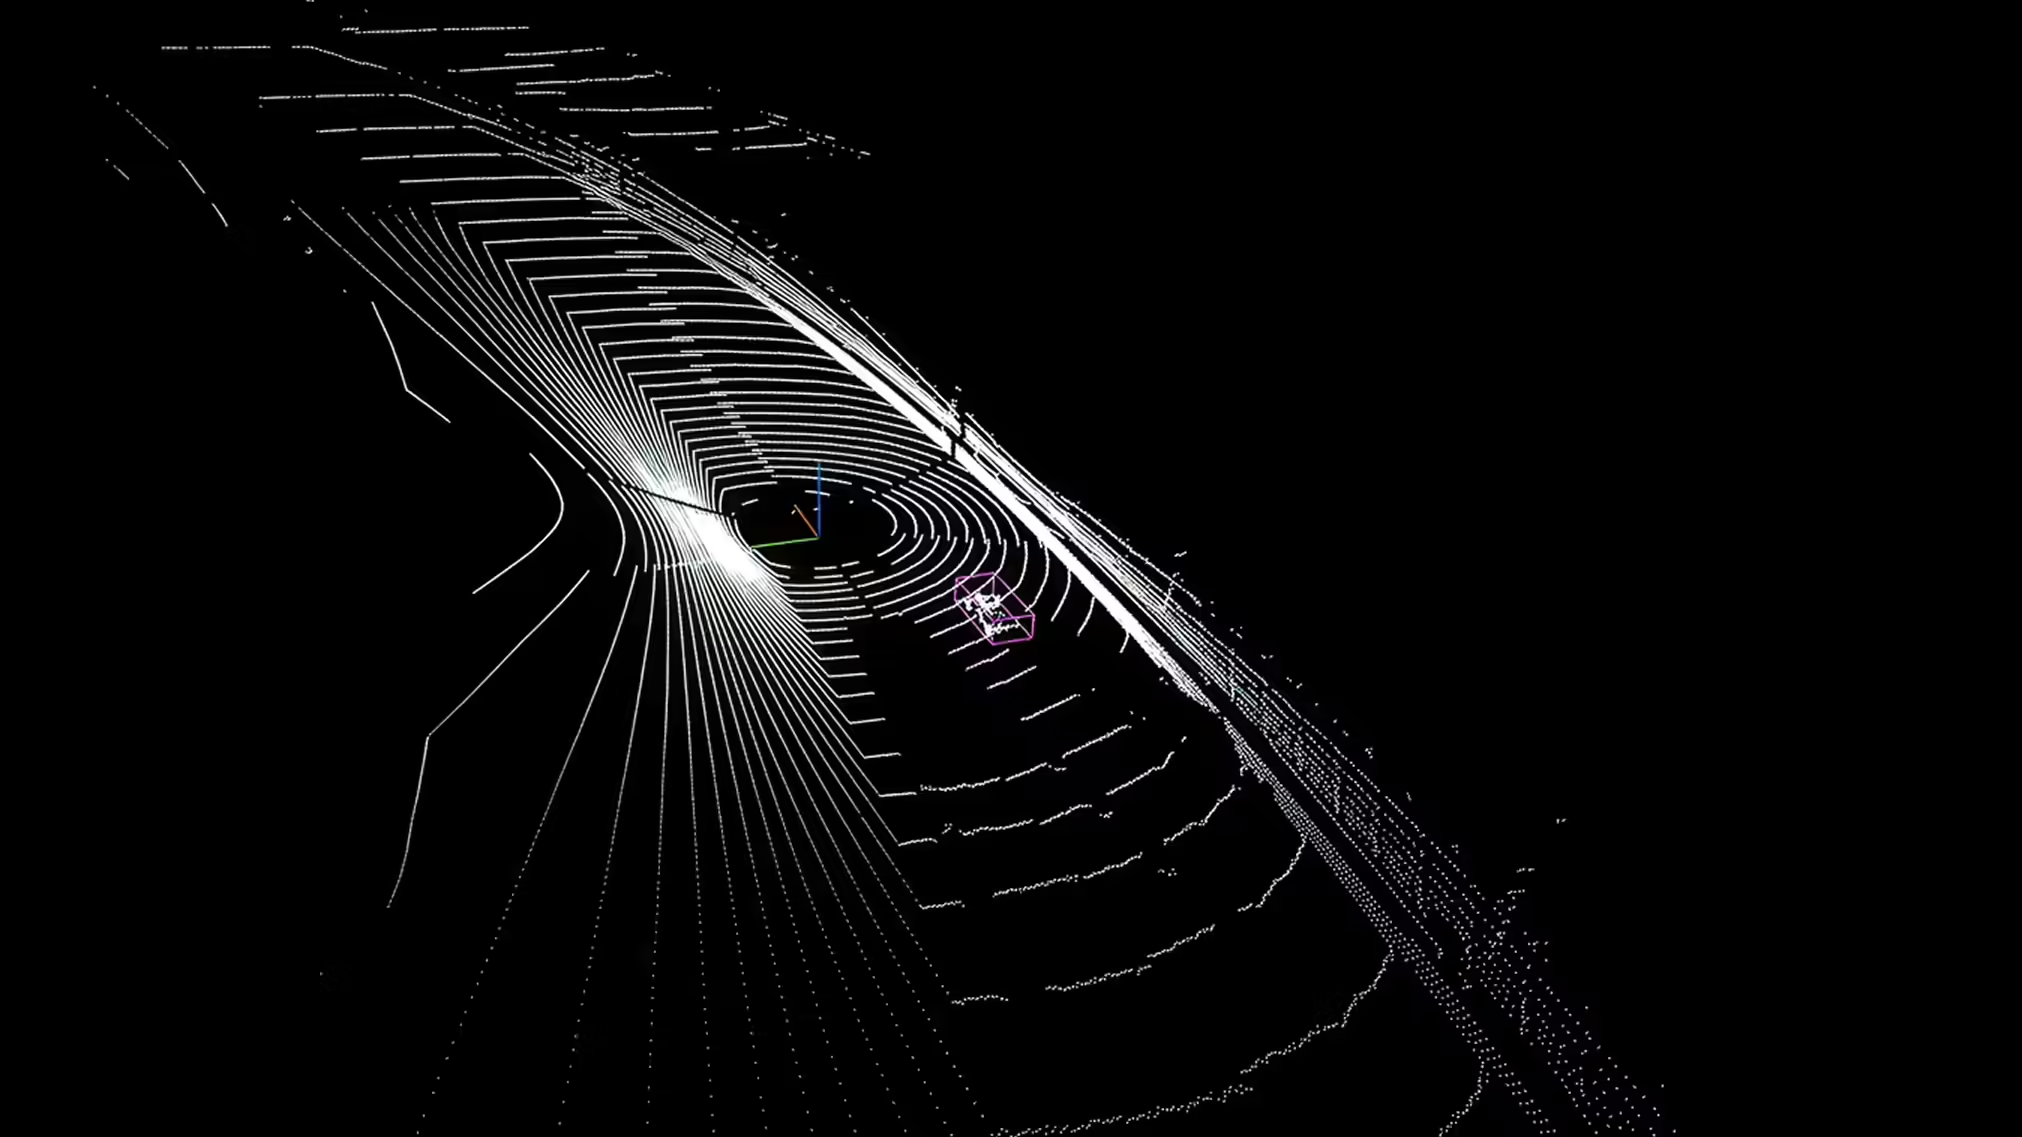
A Lidar sensor shoots out rapid laser bursts in all directions. Those lasers hit objects — cars, trees, curbs, people — and bounce back. The sensor tracks how long each pulse takes to return. That data is used to map the world in 3D with insane accuracy.
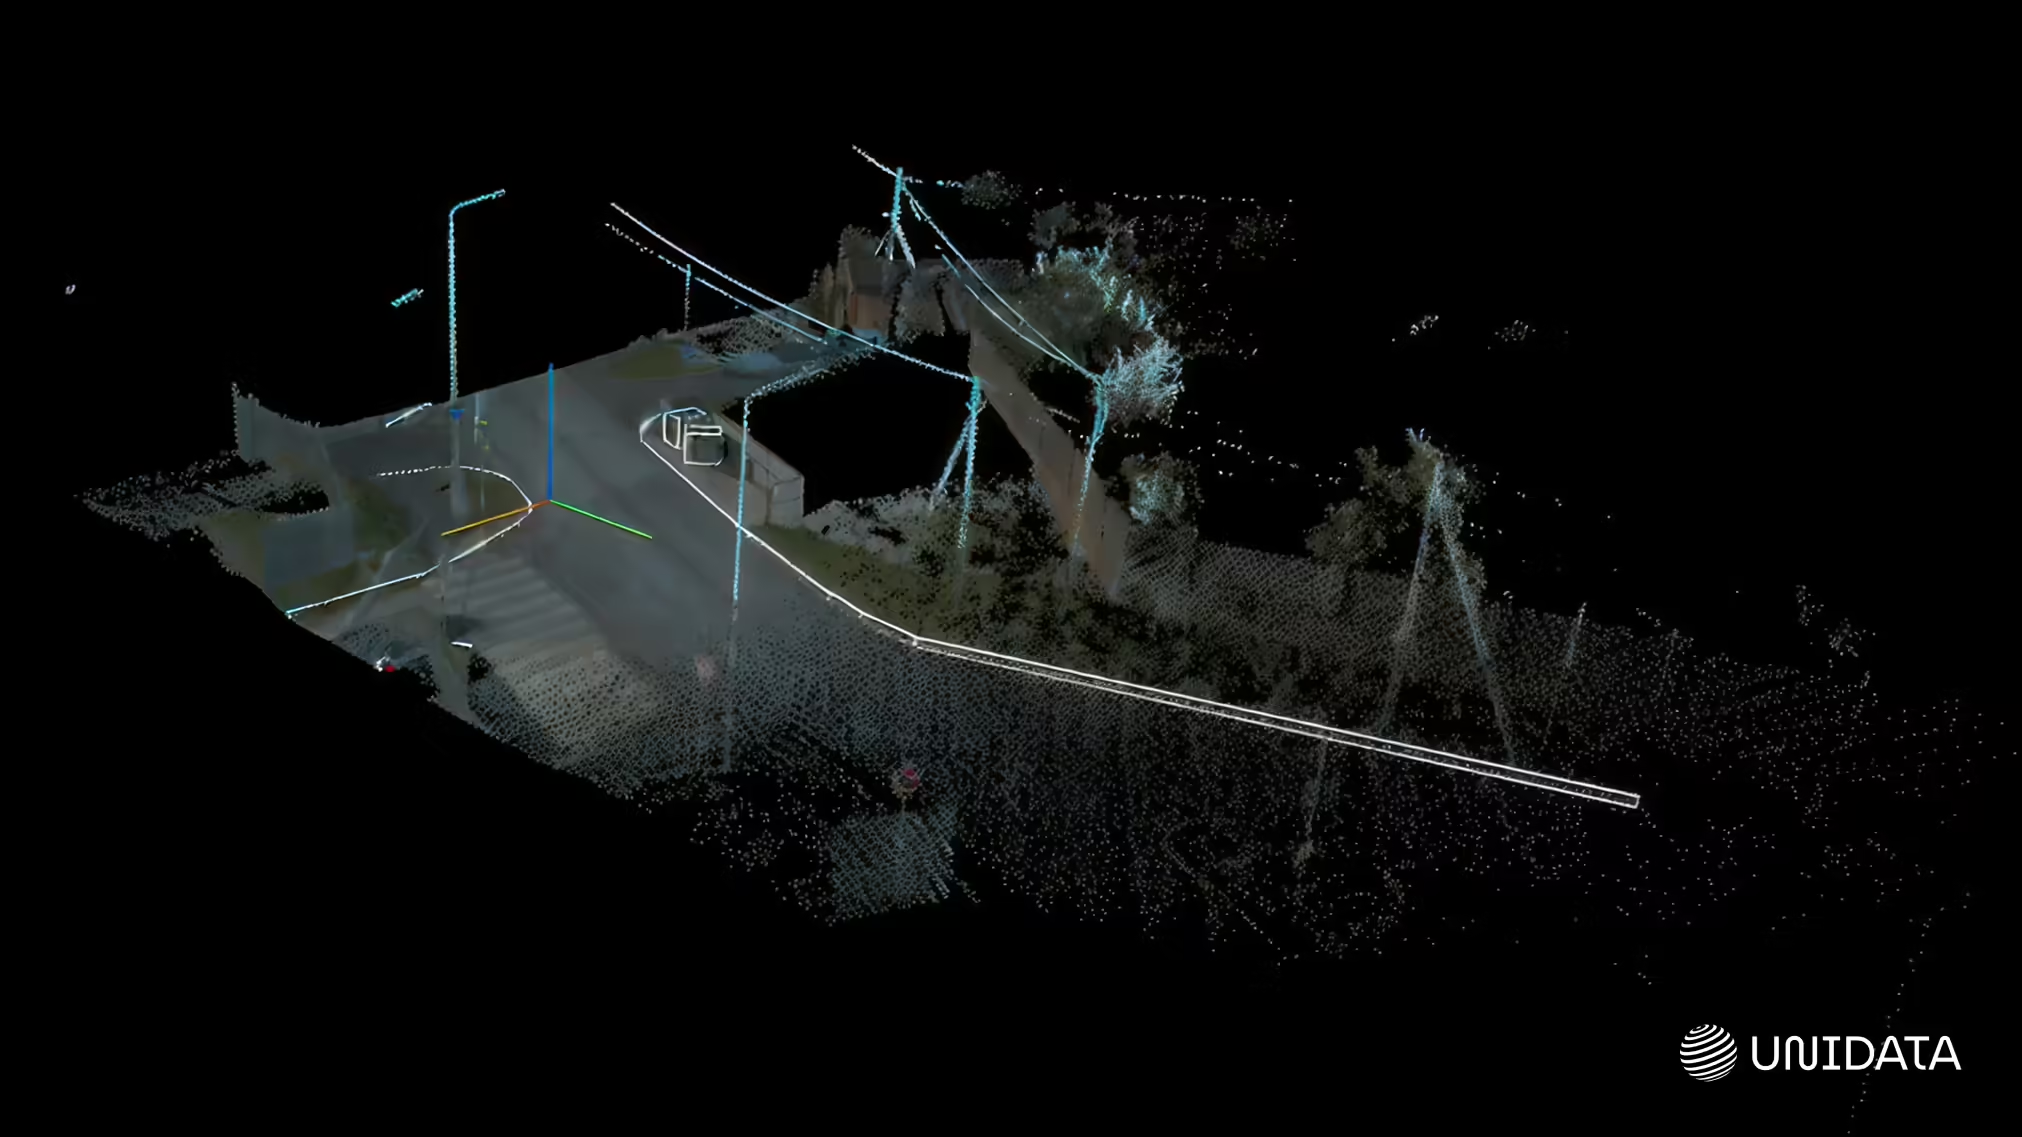
The output? A point cloud — basically, a massive swarm of dots floating in space, each one showing exactly where something is. It’s not a photo. It’s a 3D scan, down to the centimeter.
Why Lidar is a big deal:
| Superpower | What It Means |
|---|---|
| Crazy-accurate | Can measure distances within a few centimeters |
| Blazing fast | Captures millions of data points every second |
| 3D perception | Sees depth like humans do — but without blinking or yawning |
| Non-invasive | Does not disturb the surrounding environment (perfect for fields like archaeology) |
Fun Fact: NASA used Lidar to map the surface of the Moon and Mars. So yeah, it's space-grade tech.
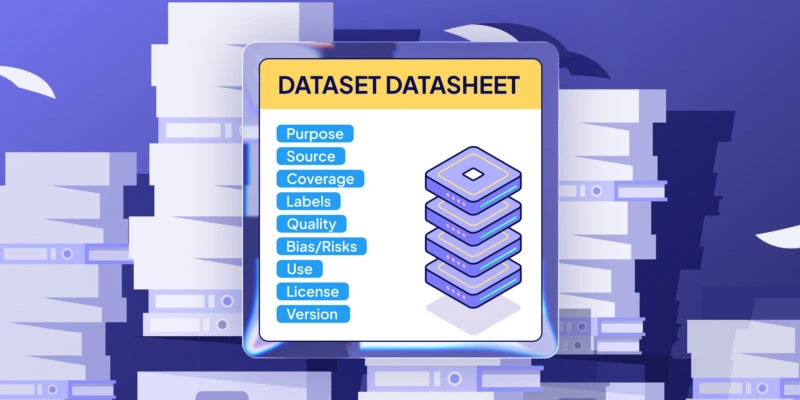
What Is Lidar Annotation?
TL;DR: You give meaning to the dots. That’s it.
So now you’ve got this dense cloud of dots. Thousands. Millions. But here’s the thing: To a machine, those dots are just… numbers. No idea what’s a sidewalk and what’s a stroller.
That’s where Lidar annotation steps in. It's the art (and science) of teaching AI what those dots actually represent.
Lidar annotation = Labeling the 3D world so machines don’t just see, but understand.
You (or your annotation tool) go through the point cloud and tag:
- “These dots form a car.”
- “This blob is a pedestrian.”
- “Flat area? That’s the road.”
- “These points are a tree — not just background noise.”
And because Lidar data lives in 3D, the annotations also need to live in 3D.
Common ways to label:
| Type of Annotation | What It Does |
|---|---|
| 3D Сuboids | Outlines objects (cars, bicycles, pedestrians) in 3D, capturing width, height, and depth. |
| Semantic Segmentation | “Paints” points by class for a fully segmented environment (e.g., asphalt in green). |
| Instance Labels | Differentiates similar objects of the same class (e.g., two pedestrians). |
| Polylines | Marks edges, lanes, curbs; three-plane method can speed work while keeping measurements (not typical for LiDAR). |
| Tracking ID | Tracks an object across frames; coordinates updated or label locked as needed. |
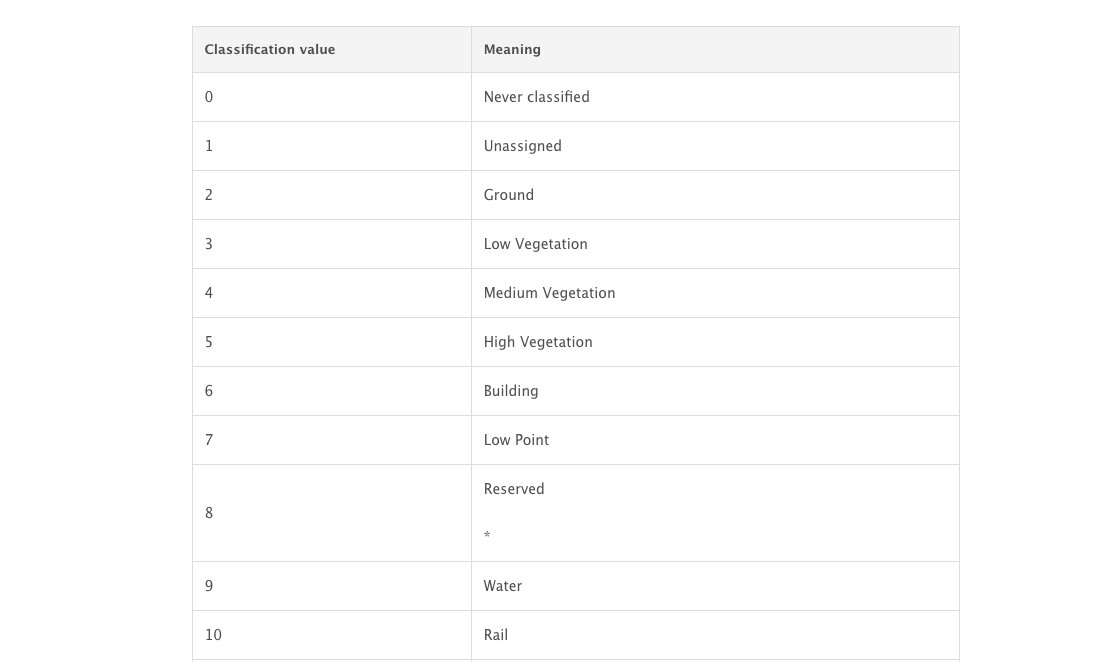
In LiDAR annotation, there are generally two separate workflows: point classification (e.g., trees, buildings), which usually assigns labels according to LAS format classification codes, and contour annotation (e.g., cuboids or polygons).
In one project, the client initially requested “point coloring,” which was ultimately delivered as full point classification — for example, marking asphalt in green.
Pro Tip: Lidar annotations don’t just label what’s obvious. They also help AI learn subtle patterns — like how fast something is moving or whether a pedestrian is about to cross the street.
Popular Lidar Annotation Tools
There are several tools built specifically for annotating 3D data. Here are some of the most widely used:
| Tool | Features | Best For |
|---|---|---|
| CVAT + 3D Plugins | Open-source, supports Lidar with plugins | Ideal for research and small projects. Handles large datasets but loads faster with smaller scenes. May take 5–10 minutes to open on some systems. Does not support .las format |
| Scale AI | Cloud-based, full-service annotation pipeline | Enterprise-level Lidar labeling |
| Labelbox | Intuitive UI with Lidar support | Teams with hybrid 2D/3D datasets |
| Supervisely | 3D annotation + visualization + collaboration | Robotics and AV workflows |
Annotation Workflow: Step-by-Step
Not just clicking boxes — this is where the magic begins.
Lidar annotation might sound like a one-step job. Load data, draw boxes, done. But under the hood, it’s more like a pipeline. Each stage matters — because if the input is messy, the output is misleading. And in AI, that’s the difference between a model that avoids obstacles… and one that thinks a shadow is a stop sign.
So let’s zoom in on what really happens behind the scenes when you annotate Lidar point clouds for machine learning.
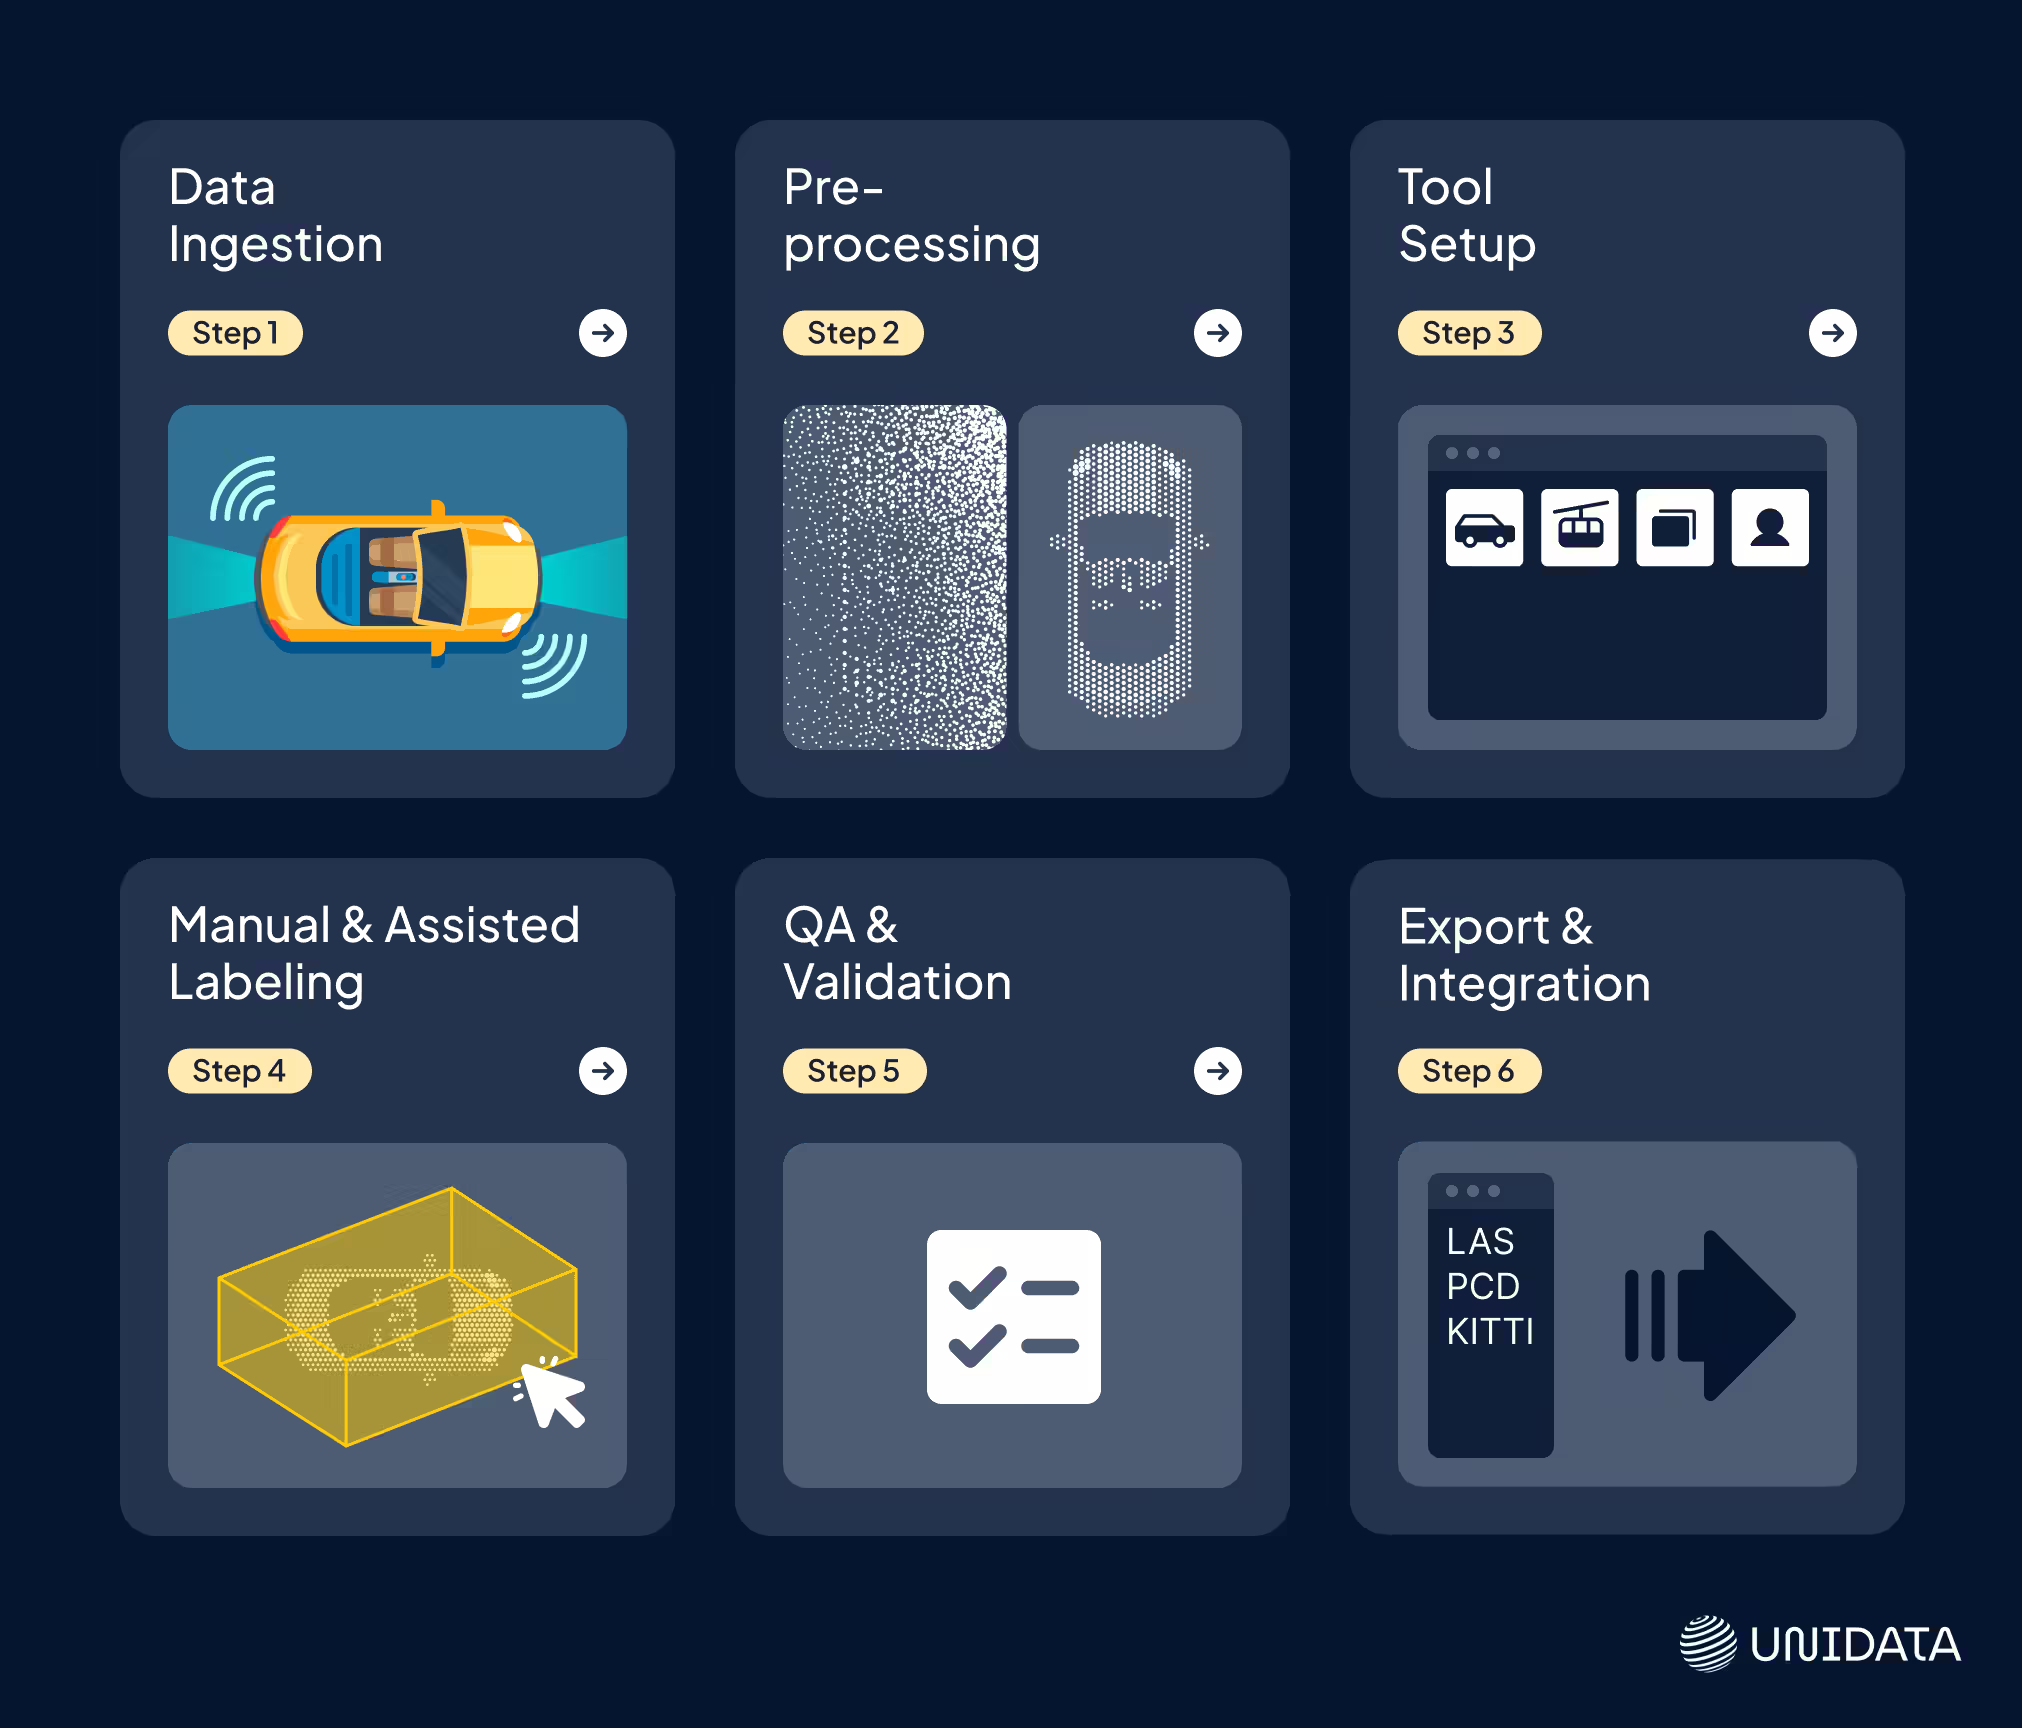
Step 1: Data Ingestion
Everything starts with getting your raw data into the system.
That means importing point clouds from Lidar sensors — usually collected by Velodyne, Ouster, Hesai, or others — into your annotation platform. These files often come in .pcd, .las, or .bin formats and can be massive.
This stage might also involve syncing Lidar data with camera footage or GPS logs to provide richer context. Especially in autonomous driving, pairing Lidar with visual data can help annotators label more accurately.
Step 2: Preprocessing
Before labeling starts, the data needs a bit of cleanup.
Lidar point clouds aren’t always perfect — they can be noisy, oversized, or contain irrelevant information. Preprocessing usually includes:
- Noise filtering: Removing stray points that don’t belong to any object
- Downsampling: Reducing point density to make the data easier to work with
- Alignment: Syncing frames in multi-sensor environments (e.g., Lidar + radar + camera)
- Normalization: Adjusting intensity values or coordinate frames for consistency
It’s a bit like prepping ingredients before cooking. You wouldn’t chop onions with the skin still on — same principle here.
Step 3: Tool Setup
This is where the rules of the project are set. The annotation team configures the tool — what is being annotated, how it should be annotated, and according to which guidelines. This can include:
- Object classes – cars, buses, bicycles, pedestrians, construction sites, etc.
- Annotation types – 3D bounding boxes, segmentation masks, polylines.
- Frame frequency – annotate every frame or, for example, every fifth frame. In our case, the client provided static frames/scenes.
- Time limit per frame – prioritize speed or accuracy? This often depends on hardware performance, which affects metric reliability. After the pilot, metrics are set and we decide whether to involve the tech team.
A “scene” is a defined area to be annotated — such as a room or a stretch of road. For cuboid annotation, we select annotators with sufficiently powerful computers. Scenes are tested for lag; if heavy, they will lag for everyone regardless of OS.
We experimented with splitting scenes into 6/8 parts, then settled on 1×16 as the optimal size — smooth performance in CVAT even on lower-spec machines. Ideally, files should be optimized for average hardware capability. Rooms often do not need splitting; maps, for example, do. Cropped LiDAR frames should be centered before annotation.
For clients, the choice of tool is usually not critical. For annotators, we check hardware specs early, as scenes can be resource-heavy.
We confirm the action pipeline in advance — for example, splitting scenes into smaller parts and later stitching them back together. Deliverables can be sent as chunks or pre-stitched. Corner cases are discussed upfront:
- Unexpected content – e.g., a large amount of debris in a scene not present in the pilot phase, which may require annotation and affect pricing.
- Hidden objects – e.g., curbs covered by snow.
- Sparse point clouds – when points are so few the scene “falls apart,” interpretation can vary. These cases are always clarified with the client.
Proper setup at this stage saves hundreds of hours later. This is also when we implement hotkeys, auto-suggestions, and templates — anything that speeds up the workflow.
Step 4: Manual and Assisted Labeling
This is where human judgment meets machine assistance.
In the past, annotators labeled every object in 3D scenes entirely by hand. Today, many tools include semi-automatic functions such as AI-based pre-annotation (e.g., automatically outlining vehicles). When our team needs to configure this capability, setup can be time-consuming and resource-heavy, which means pre-annotation is not always worth the investment — especially for one-off jobs or highly specific object classes that demand extensive tech team involvement.
Human oversight remains essential. Annotators refine labels, fix errors, and resolve edge cases — like a cyclist carrying a surfboard or a construction worker riding a scooter with a traffic cone.
Step 5: QA and Validation
Even one bad label can throw off your model.
That’s why top-tier annotation workflows bake in multiple layers of quality control. Depending on the complexity, this might include:
- Peer review — annotators check each other’s work. Less cost-efficient, but sometimes requested by the client for additional overlap.
- Automated checks — scripts detect missing labels, size errors, or annotation drift. In some cases, points from frames annotated by two different annotators can be compared directly.
The goal here is to catch subtle mistakes that could confuse a machine — like overlapping boxes, inconsistent object IDs, or mislabeled pedestrians.
Step 6: Export and Integration
Once everything’s labeled and validated, it’s time to hand it off to the ML pipeline.
Annotations are typically exported in machine-readable formats — like JSON, XML, or custom binary formats — that match the structure of your training system. Formats like KITTI, COCO, and Waymo Open Dataset formats are also common, depending on your project.
This data can then be loaded into your training pipeline to fine-tune a perception model, retrain a detection network, or evaluate performance in the real world.
Some teams even keep a feedback loop running, where model errors get fed back into the annotation pipeline for additional labeling or corrections.
Real-World Use Cases
LiDAR is used far beyond autonomous vehicles. Here are two of our real-world projects:
Case 1: Tram Route (LAS Data)
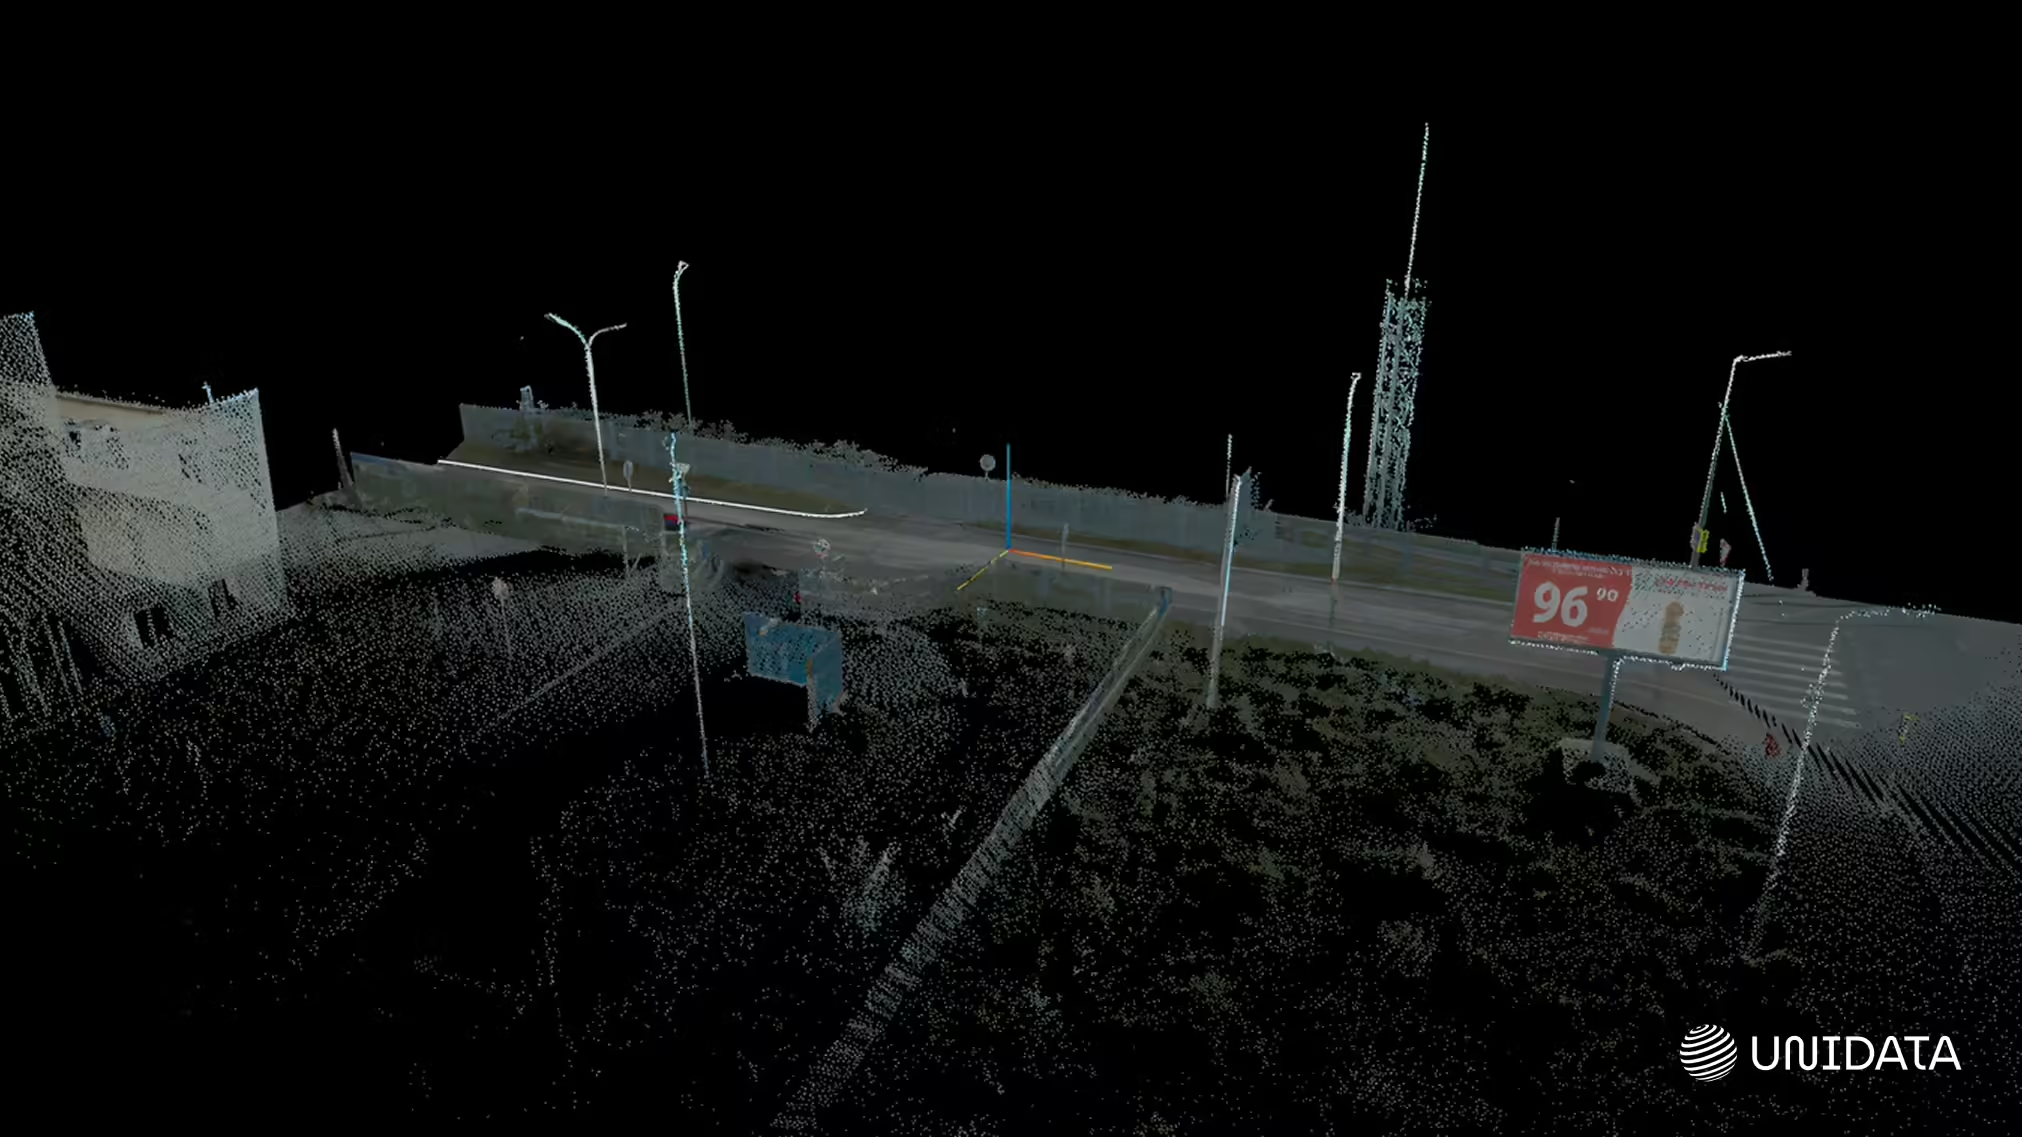
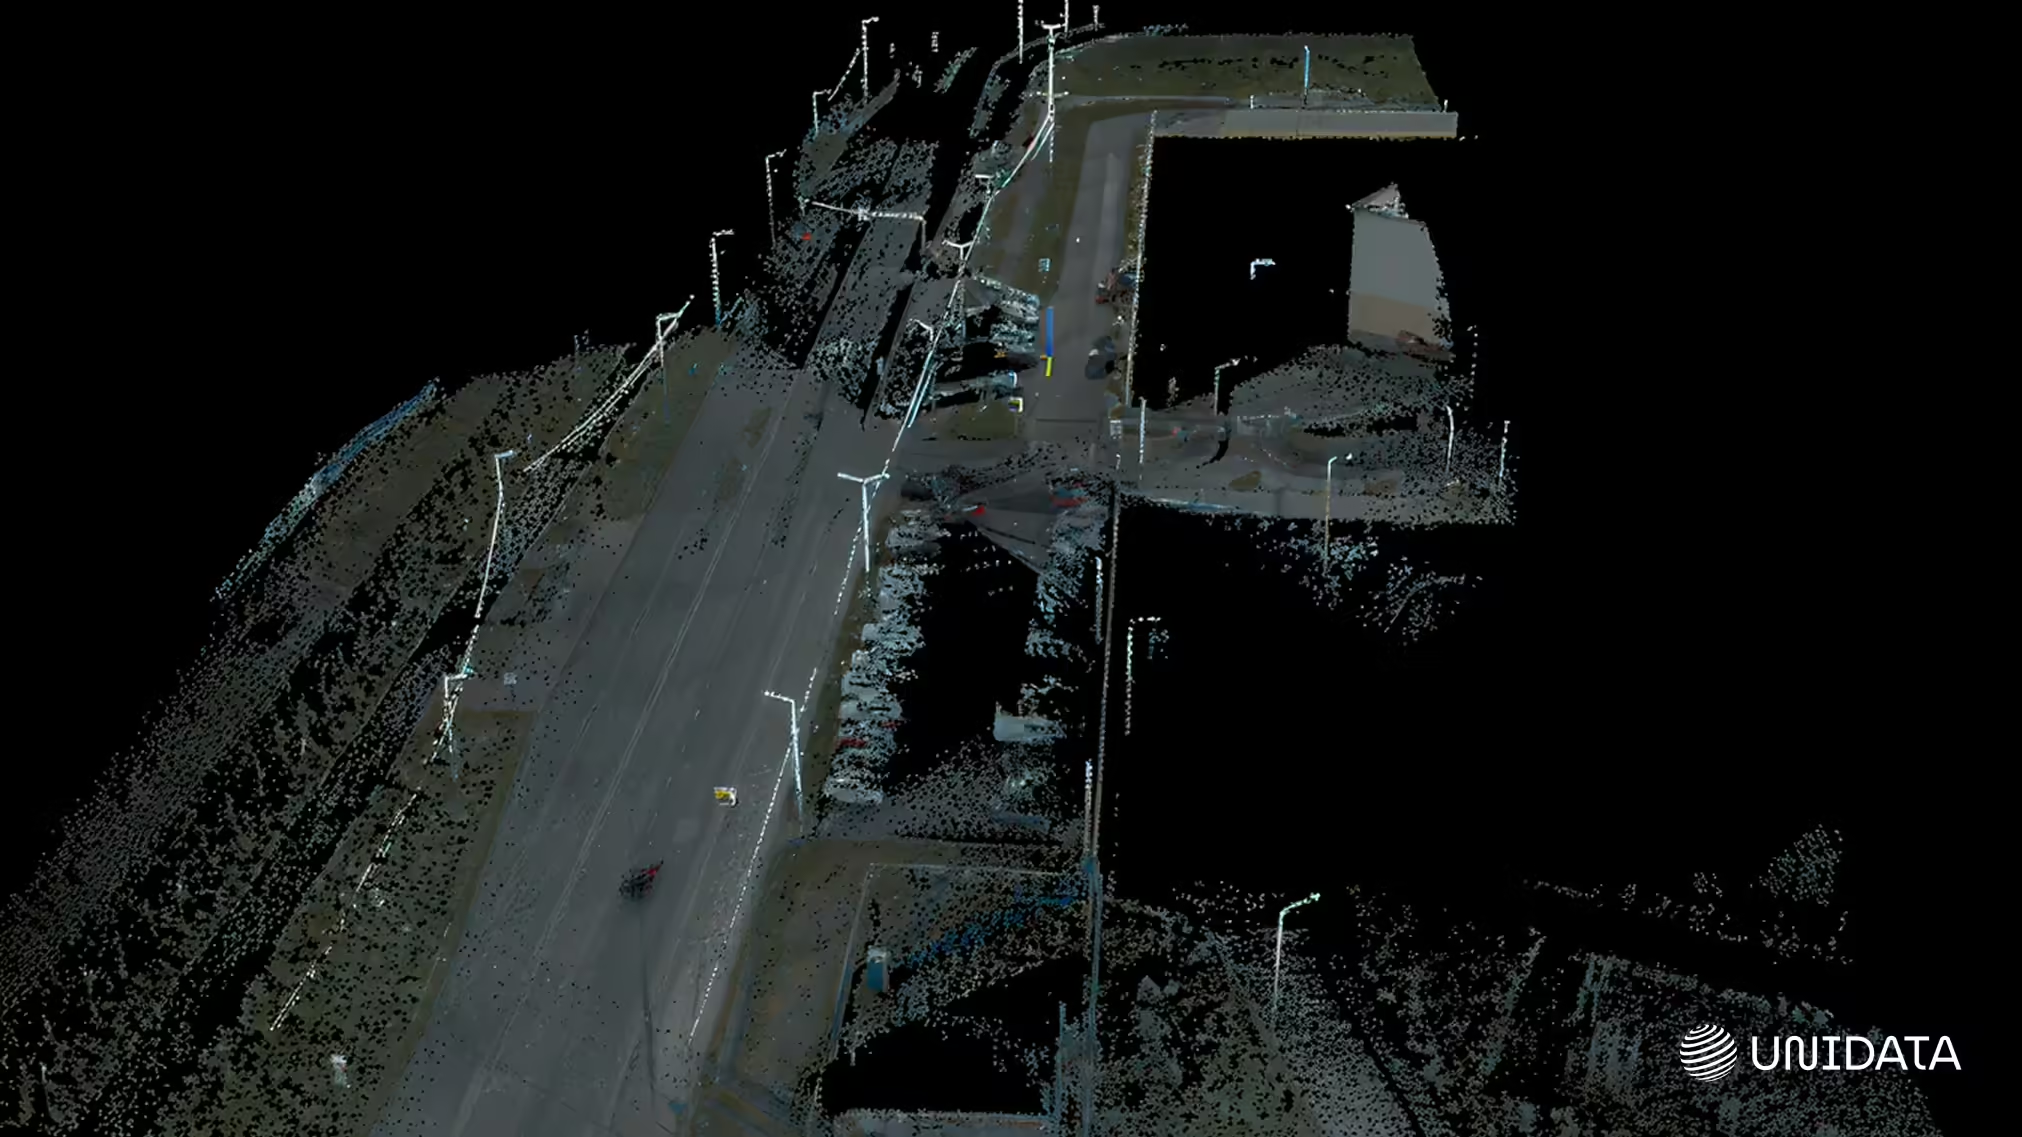
Scenario: LiDAR sensor mounted on a tram roof, capturing a continuous street view from the driver’s cabin. The scene included a wide range of urban objects — pedestrians, cyclists, people with strollers, window cleaners, cars, and street clutter. Depending on sensor quality, a very dense point cloud was generated.
Volume & Timing: Over 100 km of LiDAR data; frame rate set to every 10th frame or roughly 1 frame per second. One annotation iteration every six months.
Challenges: Data had to be collected on-site via flash drives in metro depots, which created lengthy logistics. The dense point clouds demanded powerful hardware to maintain performance.
Solutions: We addressed both issues by streamlining the annotation pipeline, allocating high-performance machines, and optimizing scene splitting and load balancing across annotators.
Case 2: Road Network LiDAR Capture
Scenario: 20 km of LiDAR data split into 64 scenes. Frame stitching was under consideration but not yet in use as the project was in early stages.
Volume & Timing: Approx. 2 weeks to process the initial delivery, with the option for additional data if needed.
Challenges: Curb annotation was still under review, with not all curbs initially included in scope. Scene stitching also posed complexity, as single objects could appear across overlapping scenes, requiring precise coordinate alignment.
Solutions: We conducted a trial run to establish clear curb annotation criteria before scaling. For stitching, we developed a protocol to ensure coordinates remained consistent and free from drift.
LiDAR annotation powers applications in many other domains. It drives autonomous vehicles (Waymo, Cruise, Aurora), guides warehouse robotics (Amazon), enables precision agriculture (John Deere), supports safe operations in construction and mining, and helps cities manage traffic and safety. It’s also key for large-scale mapping with drones, archaeological discovery, and security systems that work in any weather or light.
Challenges in Lidar Annotation
What makes 3D labeling harder than it looks? A lot, actually.
LiDAR promises precision — but the reality is messier. You get gaps, noise, and edge cases that push tools (and patience) to their limits. Annotation is not just dropping boxes; it’s wrestling with 3D data, frame by frame.
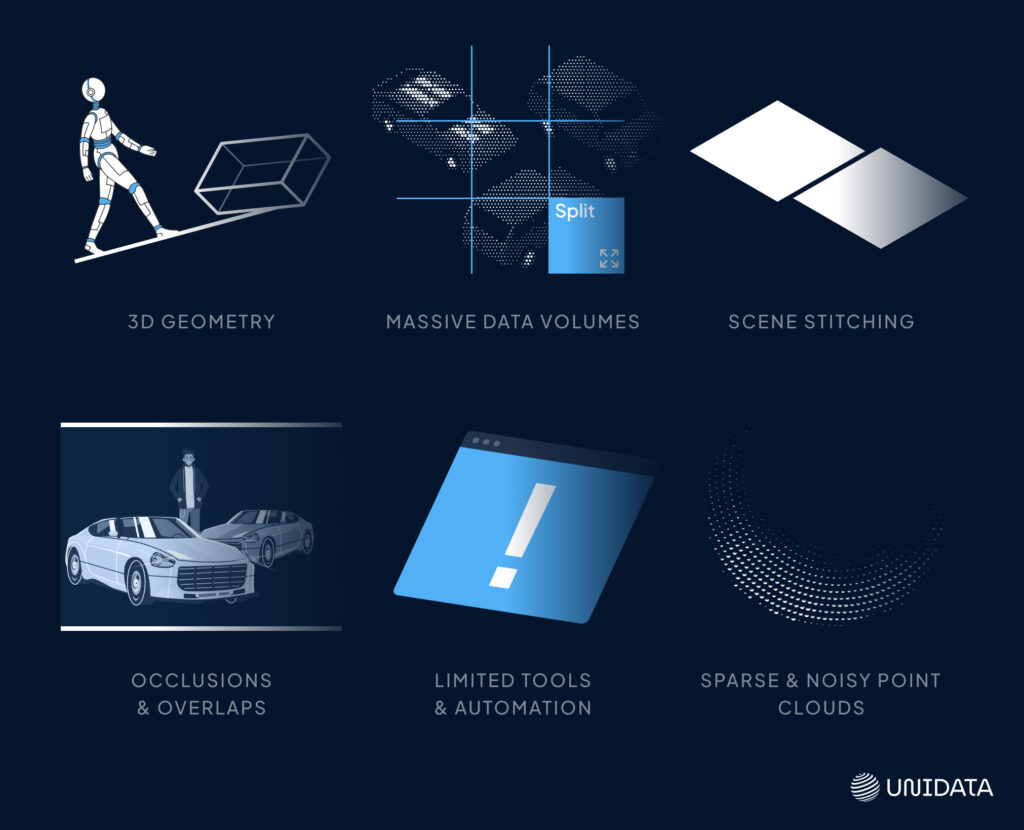
Sparse and Noisy Point Clouds
Objects lose detail with distance, and noise from reflections or sensor glitches can distort shapes.
Occlusions and Overlapping Objects
Crowds and traffic hide objects or merge them into one, forcing annotators to make educated guesses.
3D Geometry
Depth, rotation, and uneven ground make 3D boxes hard to place without constant view switching.
Massive Data Volumes
Huge point clouds from multi-sensor setups demand high performance and long processing times. Managing them often means splitting scenes — a step that can be tricky to do without causing misalignment.
Limited Tools and Automation
3D tools can lag, crash, or lack features. Complex setups, like working in CVAT or labeling certain point classes, add friction. Even automated outputs still need heavy manual cleanup.
Scene Stitching
When objects span multiple scenes, frames must be stitched with perfect coordinate alignment. Even small shifts can throw off accuracy and confuse models.
Best Practices for High-Quality LiDAR Annotation
Because a model is only as good as the labels it learns from. Good annotation isn’t just about labeling objects — it’s about consistency, context, and care.
Always Use Multiple Views
Check objects from front, top, and side angles. A box that looks fine in one view can be misaligned in another.
Combine LiDAR with RGB
When possible, overlay camera images. LiDAR gives shape and distance, RGB adds texture and detail — together they reduce guesswork.
Consistent Labeling & Training
Define object classes clearly and stick to them. Train annotators to follow the same rules so the dataset stays uniform.
Focus on Edge Cases
Rare objects — like trailers, scooters, or unusual cargo — can confuse models. Label them precisely; they matter for safety.
Smart Automation
Use AI suggestions and interpolation to speed up work, but review every result. Automation is a helper, not a replacement.
Continuous QA & Feedback
Run regular checks for missing or incorrect labels. Use model errors to refine guidelines and improve future annotations.
Final Thoughts
LiDAR annotation isn’t flashy — but it’s the backbone of spatial intelligence. From driverless cars to smart cities, its reach is growing fast, and so is the need for precision and trust. Whether you’re mapping a mine or building the next autonomous fleet, high-quality annotation is essential.
Frequently Asked Questions (FAQ)
The process of labeling 3D point cloud data from LiDAR sensors so AI models can identify objects like vehicles, pedestrians, lanes, and curbs.
It turns raw point clouds into structured, meaningful data — enabling applications such as autonomous driving, warehouse robotics, smart cities, and drone mapping.
The main types are 3D bounding boxes (cuboids), point classification, semantic segmentation, polylines, instance labeling, and tracking IDs.
Partially. AI tools can pre-label frames or interpolate between them, but human review is essential to correct errors and handle edge cases.