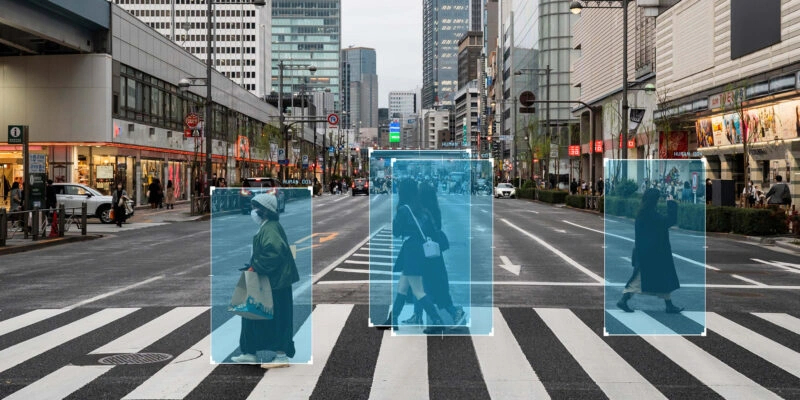
Your phone sorts photos by face. Your car knows when you’re not paying attention. And warehouses spot defects in milliseconds. Image recognition is no longer a breakthrough—it’s a baseline. This guide breaks down how it works, which models lead the field, how to prepare your data, and where to deploy your system.
Whether you're training your first model or scaling AI across the enterprise, here’s where to start.
What Is Image Recognition?
Image recognition is how machines learn to make sense of pictures—without eyes, instincts, or context. Just pixels and math. And still, somehow, they pull it off.
At first, it’s clueless. A photo is just numbers in a grid. But once trained, the model starts to get it: that cluster of edges is a face, that red curve might be a stop sign, and that odd shape? Possibly a cracked bolt.
Unlike plain object detection, which just spots things, image recognition goes one step further: it labels them. With confidence. It doesn’t just say “something’s there.” It says: “That’s a barcode, and it's upside down.”
Modern systems run on deep learning—CNNs, vision transformers, or a bit of both. Feed them enough labeled images, and they’ll learn to recognize patterns you can’t even name. You blink. They classify.
Today, image recognition drives everything from cancer scans to cashier-free checkout. And if it’s done right, the user never even notices it’s there.
Why It’s a Hot Topic Right Now
From autonomous cars to cashier-less stores, image recognition is having a moment—and the market reflects it.

What’s behind the surge?
- Cheaper compute: Cloud GPUs and TPUs make training image models affordable.
- More data: Billions of labeled images are now available, from ImageNet to custom in-house datasets.
- Better models: Transformers and self-supervised learning are pushing accuracy past old benchmarks.
The result? Image recognition has moved from research labs into retail shelves, warehouse robots, and even your front doorbell.
Popular Methods Compared
Image recognition has its cliques—and each one’s got a different superpower. Whether you want speed, nuance, or a little of both, here’s who’s on the shortlist.
Convolutional Neural Networks (CNNs)
The OGs. CNNs were built for visual grunt work—scanning images block by block, stacking patterns like Lego bricks. They’re lean, efficient, and still rule in mobile and embedded systems.
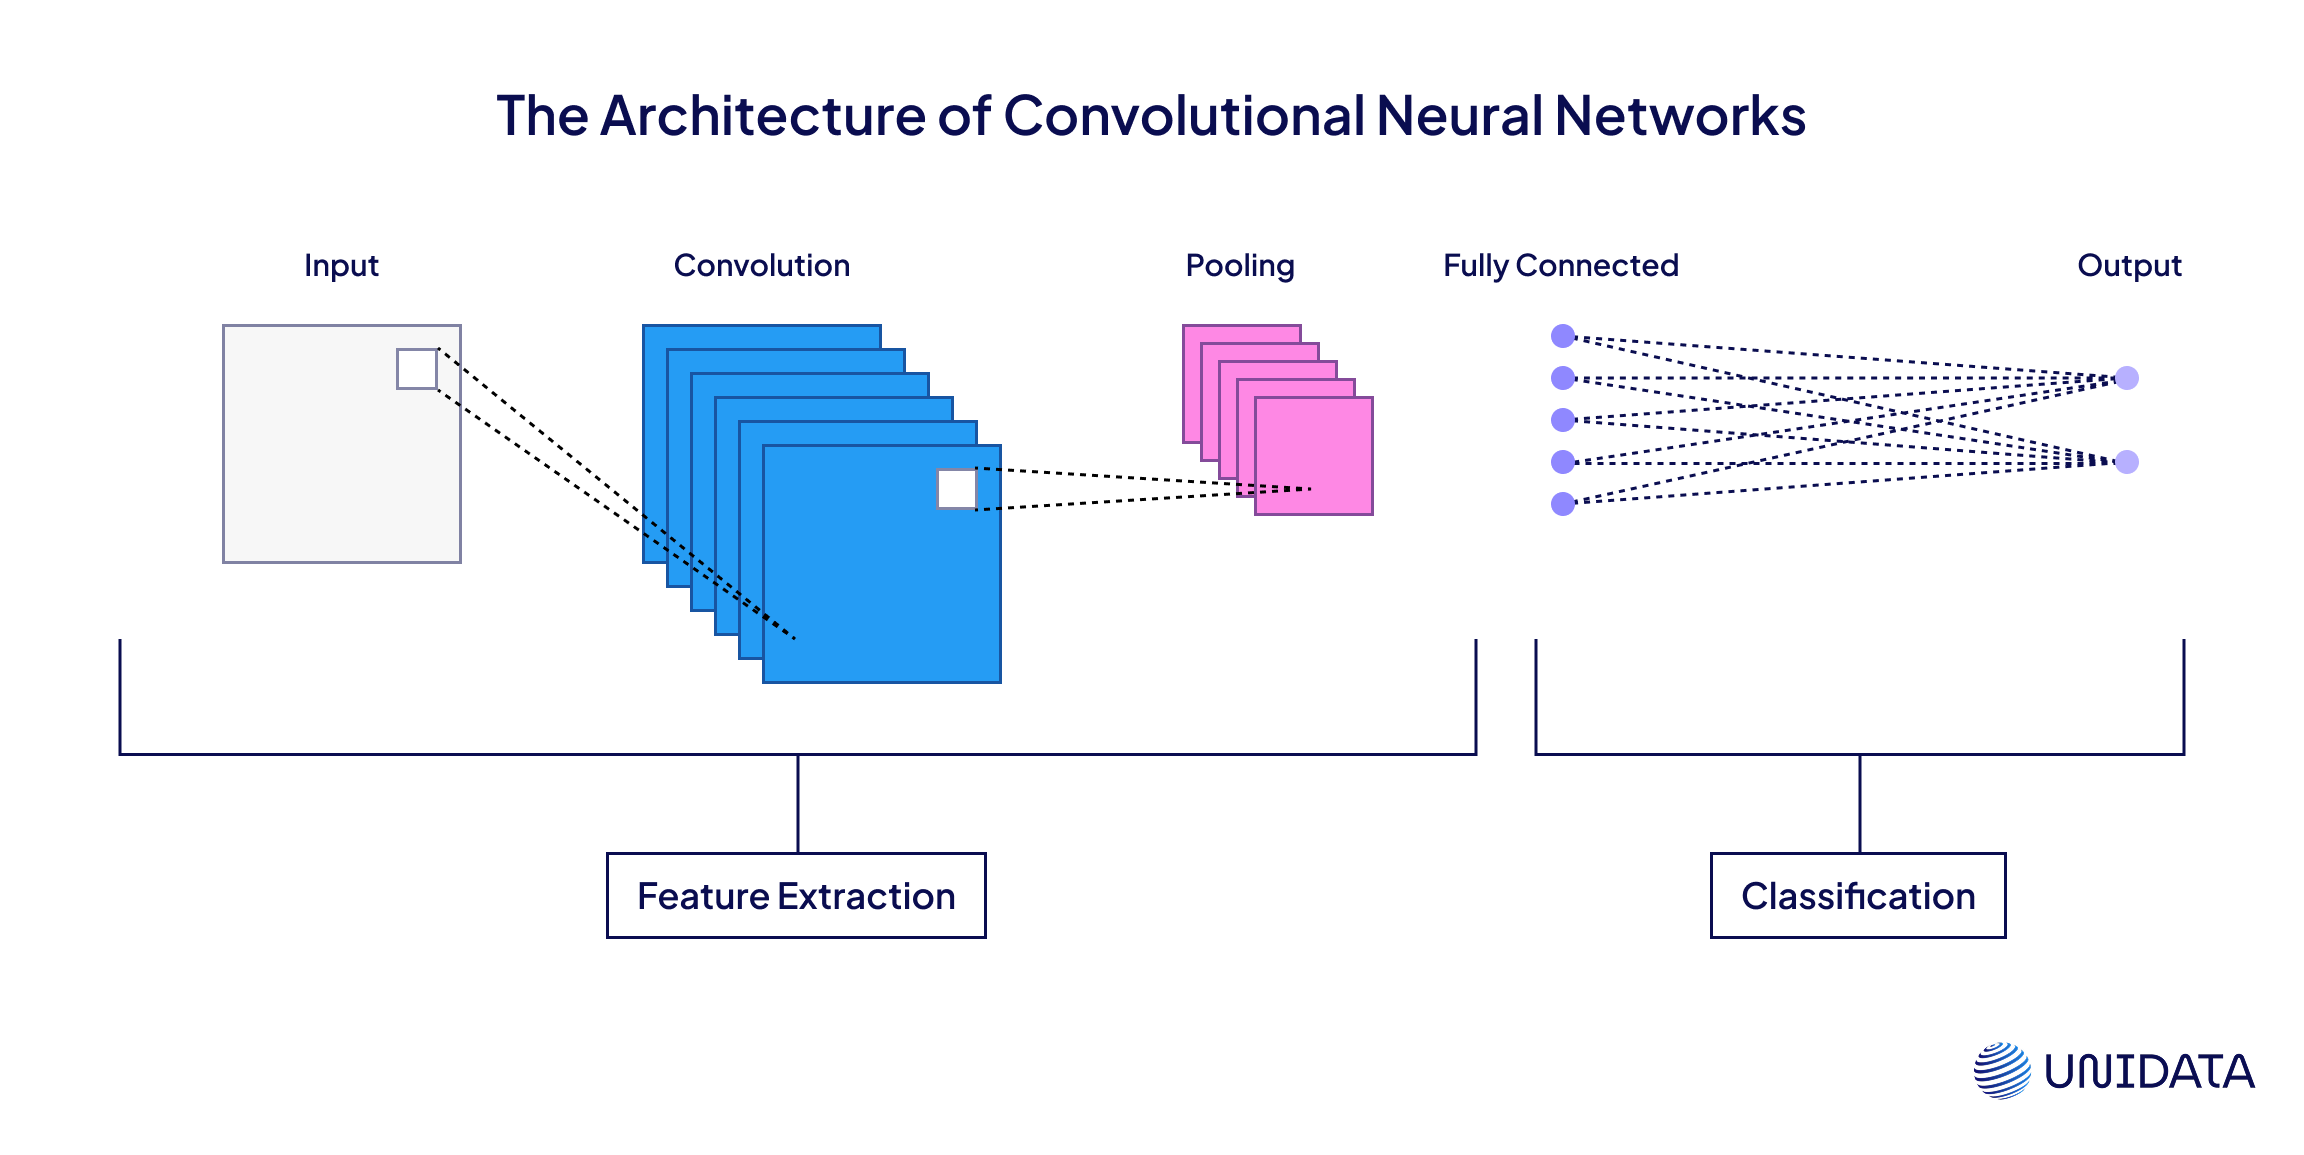
It’s as if the network is peering through a tiny peephole—say, a 3 × 3-pixel square. That peephole (a filter) glides across the image hunting for patterns: first the easy ones (edges, straight lines), then the fancy stuff (eyes, ears, full silhouettes). Layer by layer the CNN figures out which features really matter. At the final step, the math kicks in and the model blurts out, “Yep—definitely a cat.”
Solid choice when you need fast, explainable results—think quality control, face unlock, barcode detection.
Vision Transformers (ViTs)
These models don’t look at pixels—they read them like language. Instead of scanning locally, they pay attention globally (literally—self-attention is the core trick). That gives them a serious edge on complex visuals.
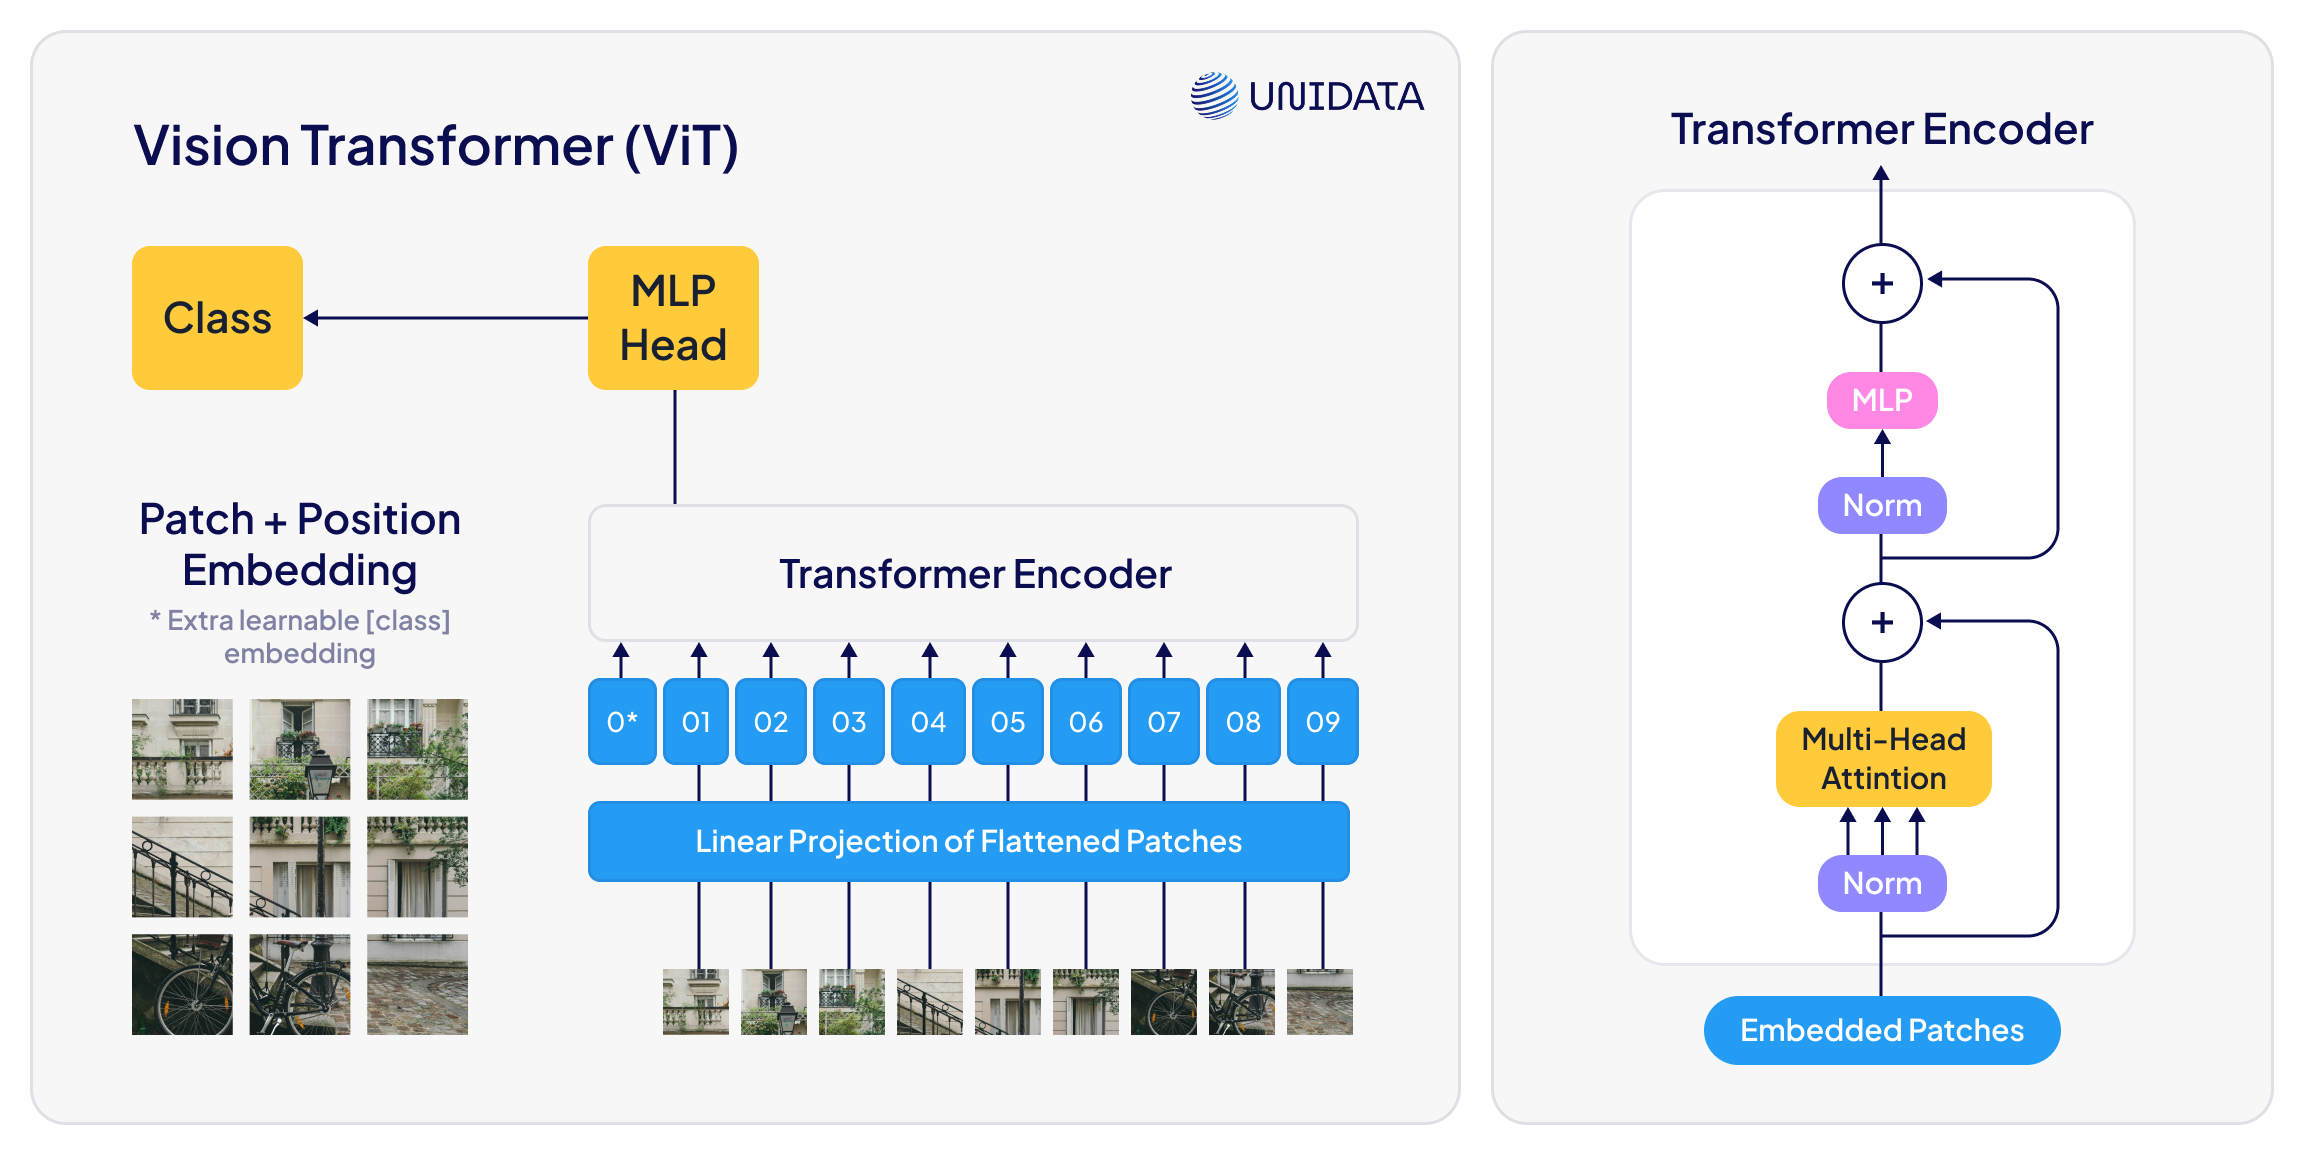
It slices the image into tiny tiles—say, 16 × 16 pixels each. Every tile is turned into a numerical vector, the way words form a sentence. Those “words” feed into a Transformer that “reads” the sequence, cross-checking how each patch relates to every other. By comparing the pieces, the ViT reasons: “Got it—a dog. I can spot an ear, a nose, and a tail, all in the right places.”
Great for high-res scans, medical images, or any case where “context” changes everything.
Just bring compute. Lots of it.
Hybrid Models
Why pick sides? Hybrid models fuse the crispness of CNNs with the perspective of transformers. Early layers catch textures and edges; deeper layers think big-picture.
Perfect for systems that need both local precision and holistic understanding, like satellite mapping or multi-object detection in chaos-heavy scenes.
How Image Recognition Works (Step by Step)
When you send an image through a recognition system, the model doesn’t just look—it interprets. Here's how that moment of machine “vision” actually works:
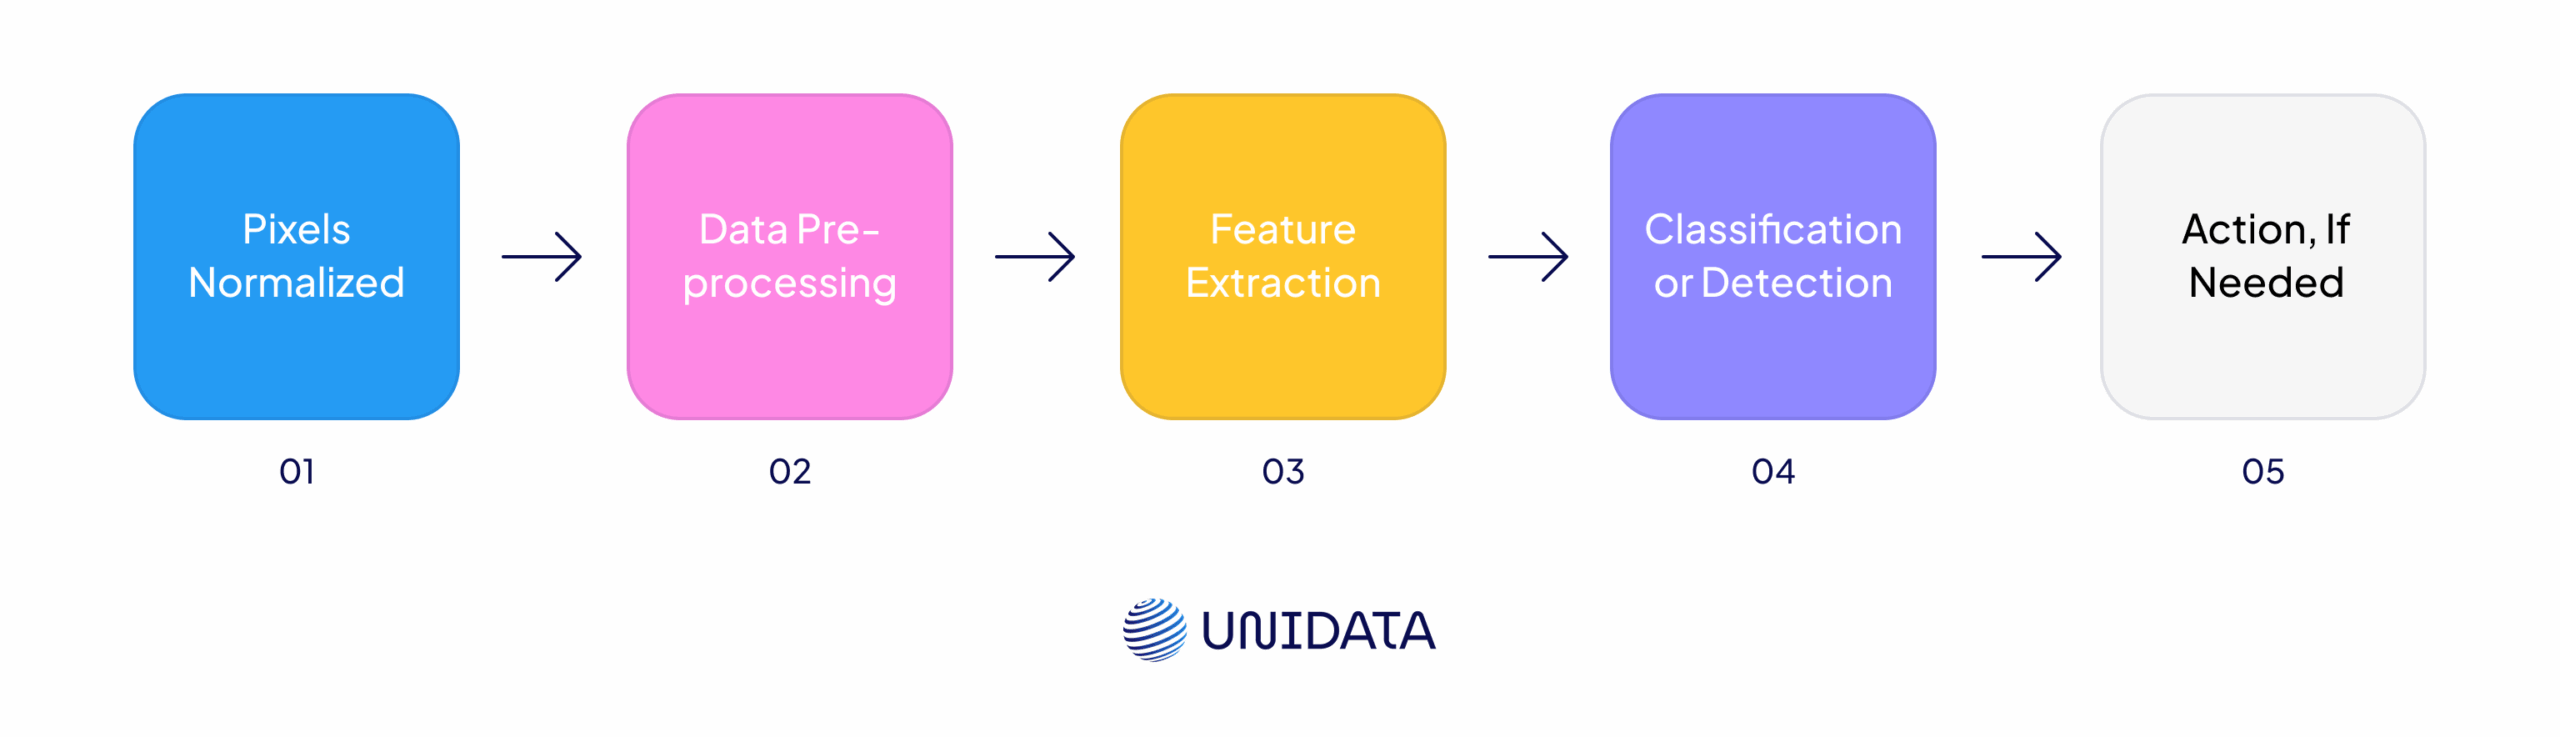
Image In, Pixels Normalized
The input arrives—maybe it’s a security snapshot or a product photo. The model trims it to the right shape, smooths out the pixels, and prepares it for analysis.
Data pre-processing
The model resizes each frame to the target resolution, smooths pixel noise, normalises brightness and contrast, and—when useful—applies augmentation (flips, crops, colour jitter). The result is a clean, consistently shaped input ready for analysis.
Step 1:
Resize, normalize, and (optionally) augment the image so it’s clean and consistent before model input.
from torchvision import transforms
from PIL import Image

# Load and prepare the image
img = Image.open("your_image.jpg").convert("RGB")

# Define the preprocessing pipeline
preprocess = transforms.Compose([
    transforms.Resize((224, 224)),               # Resize to standard input size
    transforms.ColorJitter(brightness=0.2),      # Optional augmentation
    transforms.ToTensor(),                       # Convert to tensor (0–1 range)
    transforms.Normalize(mean=[0.485, 0.456, 0.406],  # Normalize
                         std=[0.229, 0.224, 0.225])
])

# Apply it
input_tensor = preprocess(img).unsqueeze(0)  # Add batch dimension
Feature extraction
A convolutional neural network (CNN) or a Vision Transformer (ViT) pulls out two tiers of cues:
- Low-level: edges, lines, textures.
- High-level: shapes, whole objects, even individual parts like eyes or wheels.
Step 2:
Feed the image into a pre-trained CNN or ViT to extract patterns—from simple edges to complex shapes.
import torch
import torchvision.models as models

model = models.resnet50(pretrained=True)
model.eval()  # Set to inference mode

# Pass through the network
with torch.no_grad():
    logits = model(input_tensor)
Classification or detection
Those features feed into fully connected layers—or an attention block in the case of a transformer. The final layer outputs class probabilities (typically via soft-max). For detection tasks the network also returns bounding boxes that frame each object’s location.
Step 3:
Convert raw model scores (logits) into human-readable probabilities that sum to 1.
import torch.nn.functional as F

# Convert raw scores (logits) to probabilities
probs = F.softmax(logits, dim=1)

# Get top-1 prediction
pred_class = torch.argmax(probs, dim=1).item()
confidence = torch.max(probs).item()
Here’s a simple visual that shows how the final step—classification with softmax—actually works:
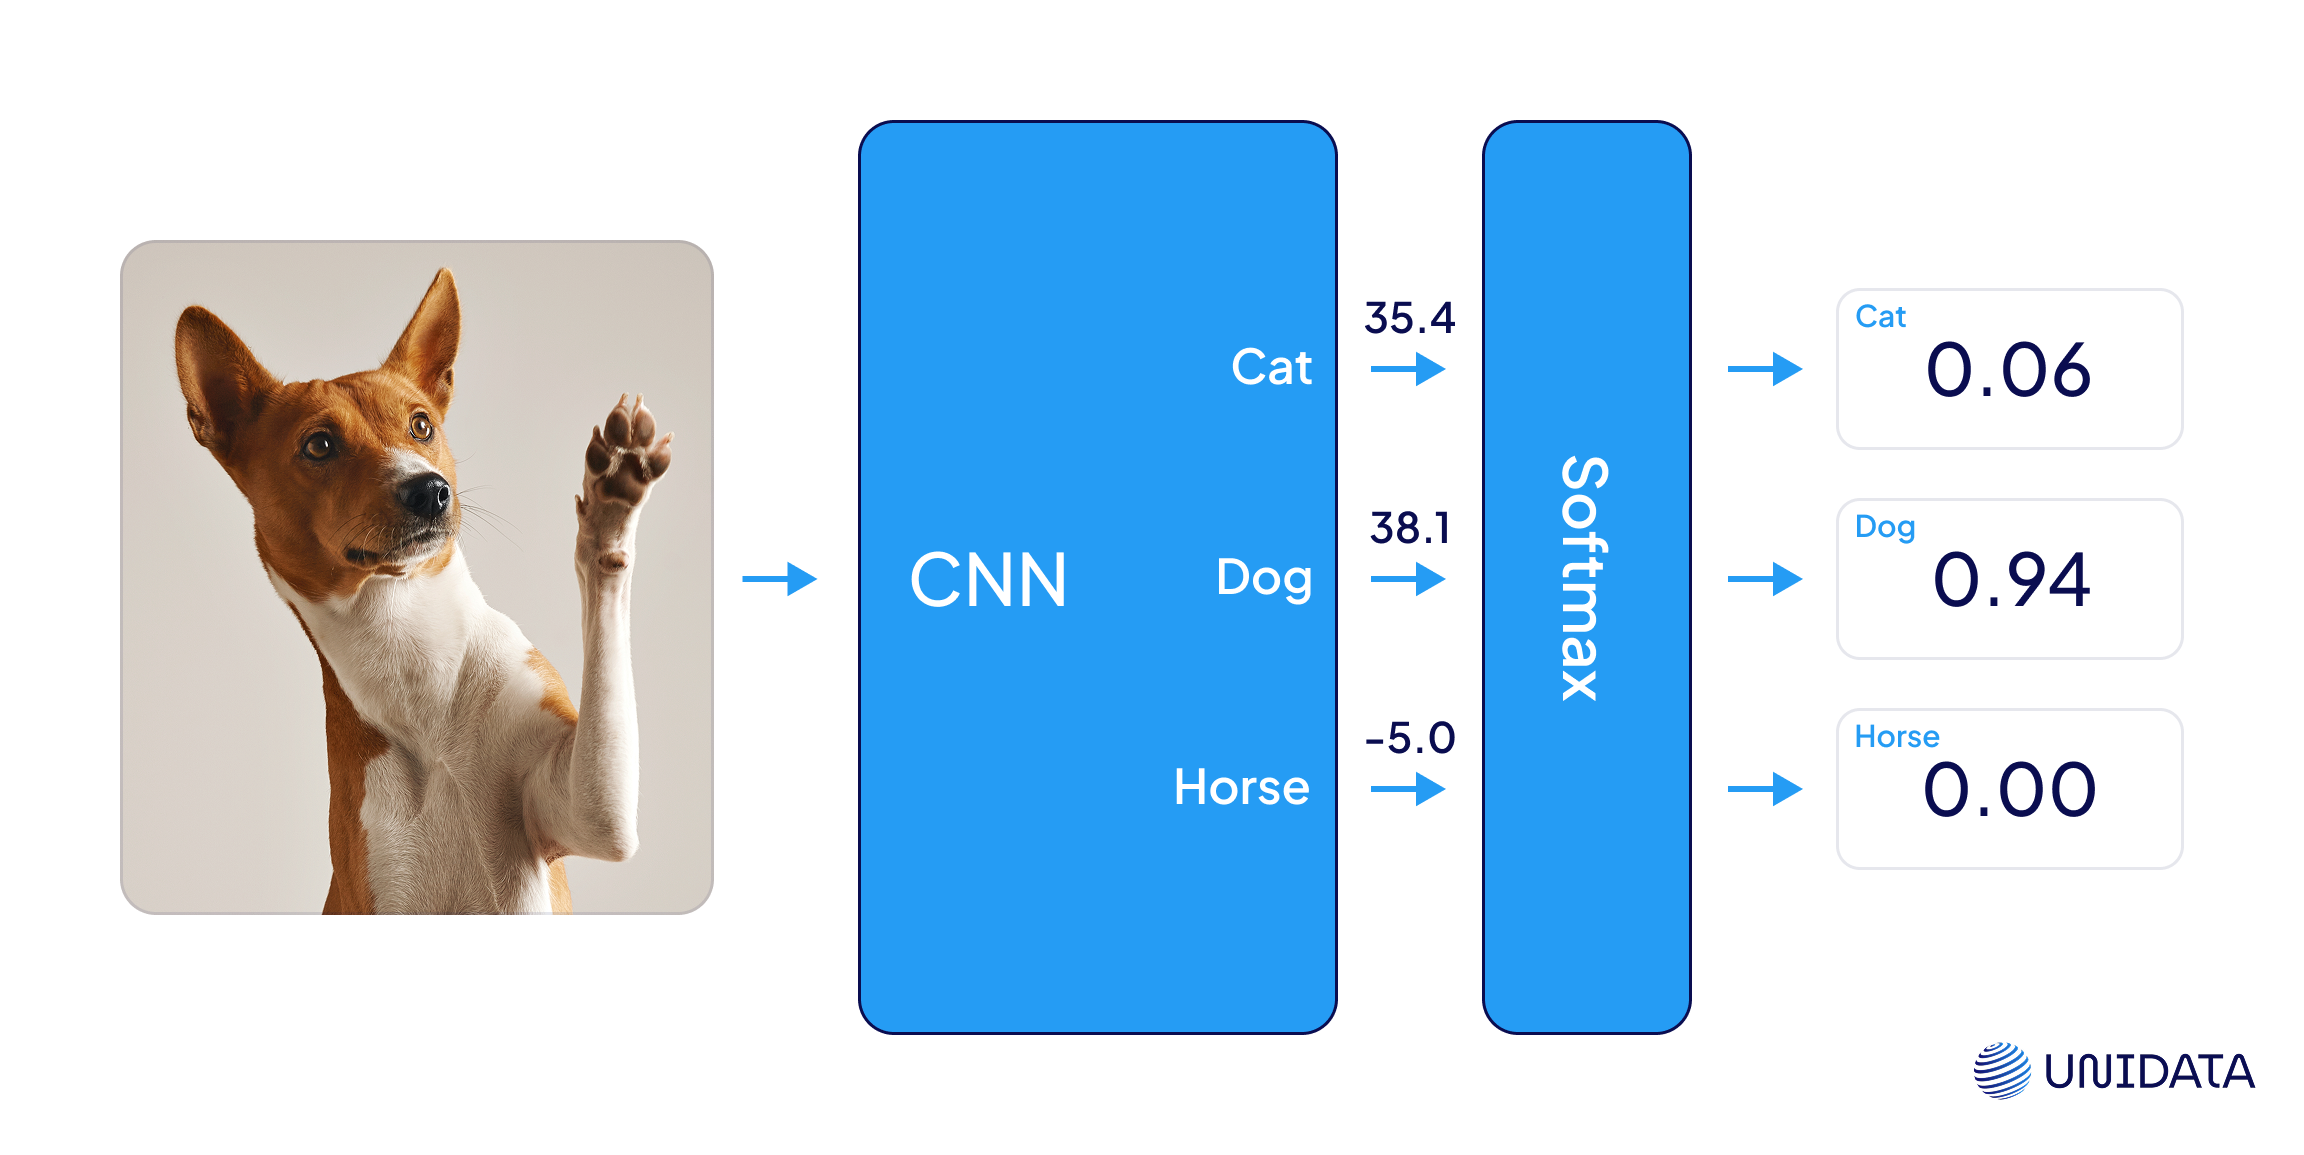
Softmax takes the raw output scores from the model (called logits) and turns them into probabilities. It makes sure all values are between 0 and 1 and add up to exactly 1—so you can clearly see which class the model thinks is most likely.
Action, If Needed
In real-world systems, the output isn't the end. It might unlock a door, reject a product, or flag a high-priority alert—depending on what the model saw.
Step 4:
Trigger the right response—like granting access or raising an alert—based on the predicted class and confidence level.
# Define your class labels
labels = ["cat", "dog", "horse", "..."]  # replace with full list

print(f"Prediction: {labels[pred_class]} (confidence: {confidence:.2%})")

# Trigger action (example)
if labels[pred_class] == "dog":
    print("✅ Access granted: tail-wagging detected.")
elif confidence < 0.6:
    print("⚠️ Low confidence. Flag for review.")
else:
    print("🚫 Action denied.")
Getting the Data Ready
Even the best model can’t recognize what it’s never seen. Image recognition systems are only as good as the data they’re trained on—and that starts with getting your images in shape.
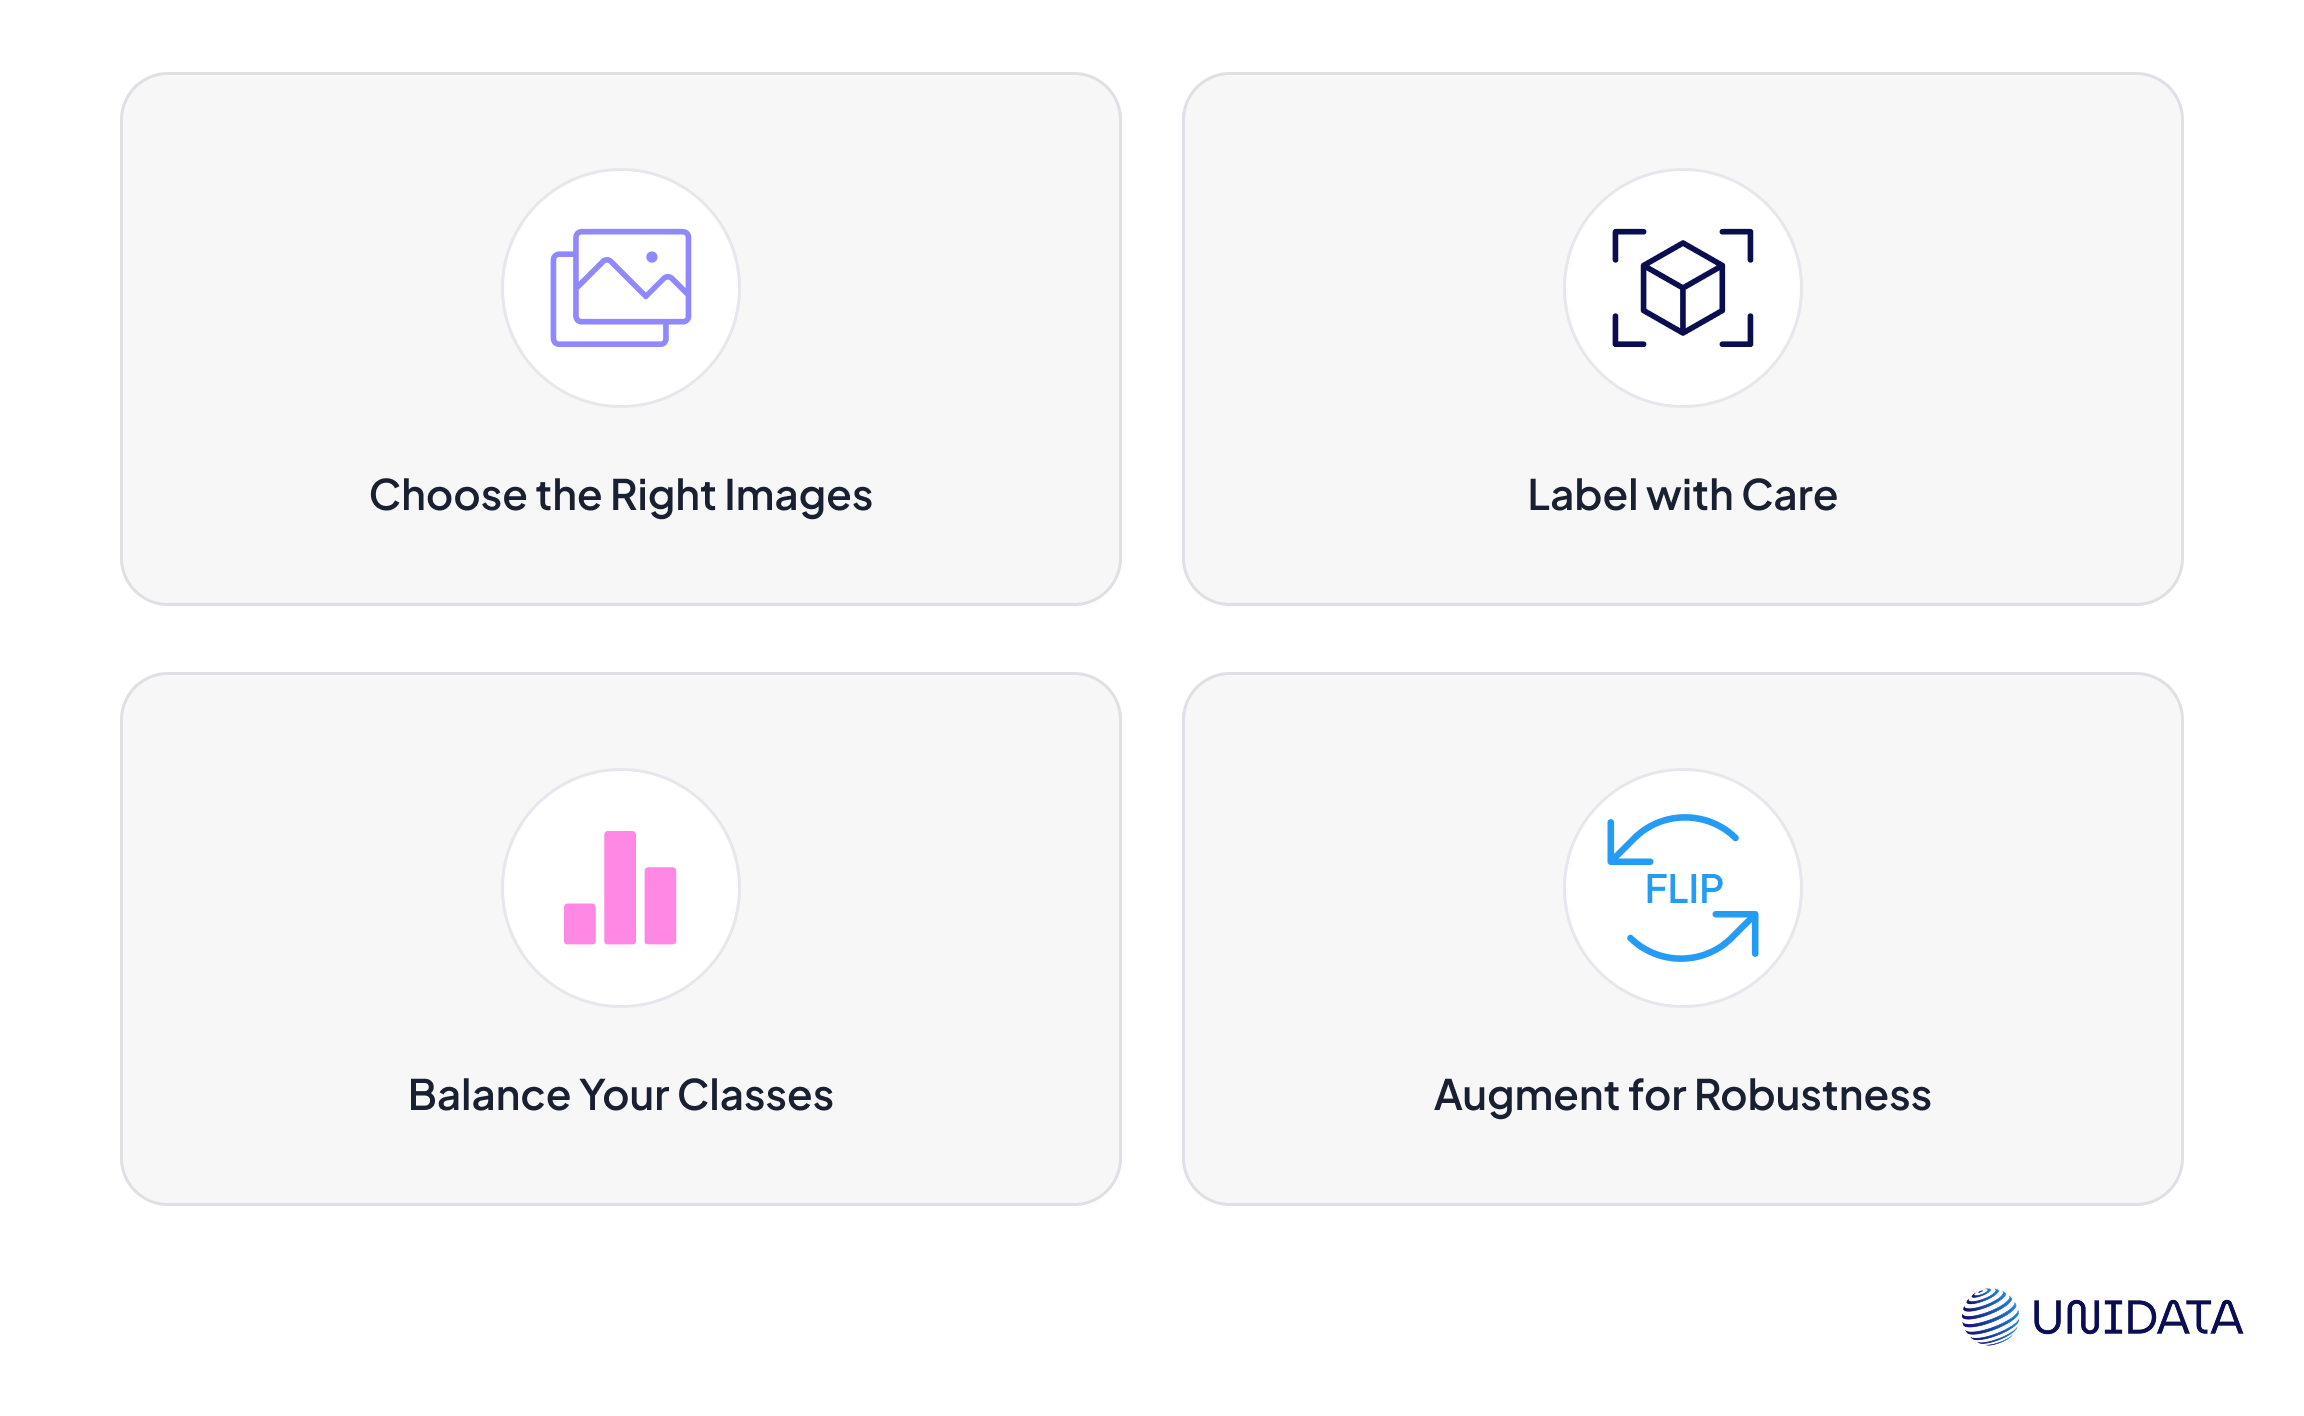
1. Choose the Right Images
Your dataset needs to reflect the real-world conditions your model will face. That means capturing images in the same lighting, angles, and resolution as the production environment. If you’re building a defect detector, include examples of both perfect and flawed items—ideally from multiple angles.
2. Label with Care
Each image needs an accurate label. For simple classification, this might be one tag (“apple,” “glass,” “crack”). For object detection or segmentation, you’ll need bounding boxes or pixel-level masks. Bad labels confuse the model—no matter how good the architecture.
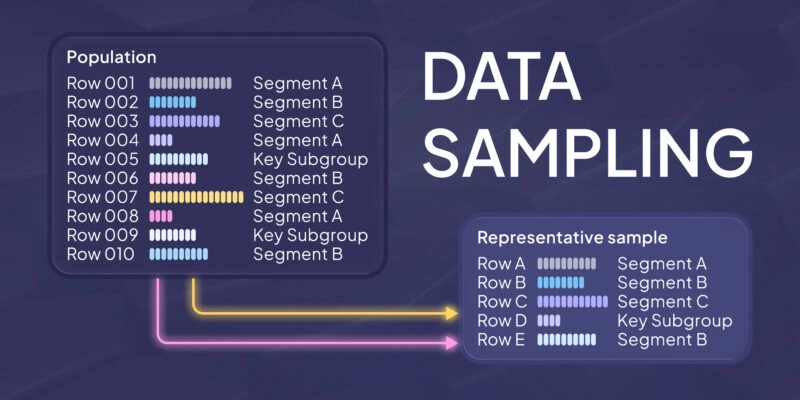
3. Balance Your Classes
Don’t train your model to find cracks if 98% of your data is flawless parts. Class imbalance leads to overconfident predictions and missed edge cases. Use sampling techniques or weighted losses to fix this if needed.
4. Augment for Robustness
Real-world images aren’t perfect. They’re blurry, off-center, or poorly lit. To make your model handle those imperfections, you can apply data augmentation—minor tweaks that simulate real-world noise while preserving label meaning.
For example, this snippet applies rotation, slight shifts, and horizontal flipping during training:
from tensorflow.keras.preprocessing.image import ImageDataGenerator

# Set up basic data augmentation
datagen = ImageDataGenerator(
    rotation_range=15,         # randomly rotate images by ±15 degrees
    width_shift_range=0.1,     # shift images horizontally by 10%
    height_shift_range=0.1,    # shift images vertically by 10%
    horizontal_flip=True       # randomly flip images horizontally
)
These transformations make the model more resilient—so it won’t panic when a product is tilted or off-center. Without augmentation, small variations in your input could cause big drops in accuracy.
Where You Can Run It
So your model’s trained and working—great. But where does it actually live?
That choice matters more than you think. It affects everything from speed to privacy to the price of scaling. Let’s walk through the real-world setups and how they actually play out.
Cloud
A startup launches a visual search app. Users upload selfies, and the backend matches them to thousands of product looks. The model runs on a cloud GPU cluster, updated weekly with new inventory.
Cloud is great for scale and convenience. You get elastic compute, fast iteration, and minimal ops. But every image takes a round trip online, which means slower responses—and your data’s out of your hands.
Great for: SaaS tools, large datasets, models that change often.
Edge
At a factory in Germany, a server racks next to the production line. It runs a defect detection model that flags misaligned parts in under 100ms—no internet involved.
Edge setups process images close to where they’re captured. That means low latency, high reliability, and zero cloud dependency. But the hardware has to be maintained, and updates aren’t always smooth.
Great for: Industrial QA, hospitals, security systems.
On-Device
In a cashierless store, a ceiling-mounted smart camera watches for basket contents. The model runs right on the device itself. No lag, no uploads—just local inference, real time.
On-device inference is the most private and responsive setup. But you’re working with limited compute, so models need to be compressed or quantized.
Great for: Phones, wearables, IoT, anything unplugged.
Want it fast and cheap? Start in the cloud.
Want it fast and private? Go edge.
Want it invisible? Shrink it down and embed it.
Deployment isn’t just a tech decision—it’s product strategy.
Real-World Uses by Industry
Image recognition isn’t a lab demo anymore—it’s already embedded in workflows across industries. And in most cases, the user barely notices it’s there.

In manufacturing, image recognition powers real-time defect detection. High-speed cameras scan parts on the line, while models catch cracks, misalignments, or missing components before humans ever intervene. The result: fewer recalls, less waste, and tighter QA loops.

In healthcare, AI models help radiologists flag anomalies in X-rays, MRIs, and pathology slides. They don’t replace the doctor—but they often catch what the eye might miss. Some systems even prioritize urgent cases based on visual patterns that hint at serious issues.

In retail, cameras paired with image models track shelf inventory, detect shoplifting behaviors, and power cashier-less checkout experiences. It’s how stores like Amazon Go let customers walk out without scanning a thing—and still charge the right amount.
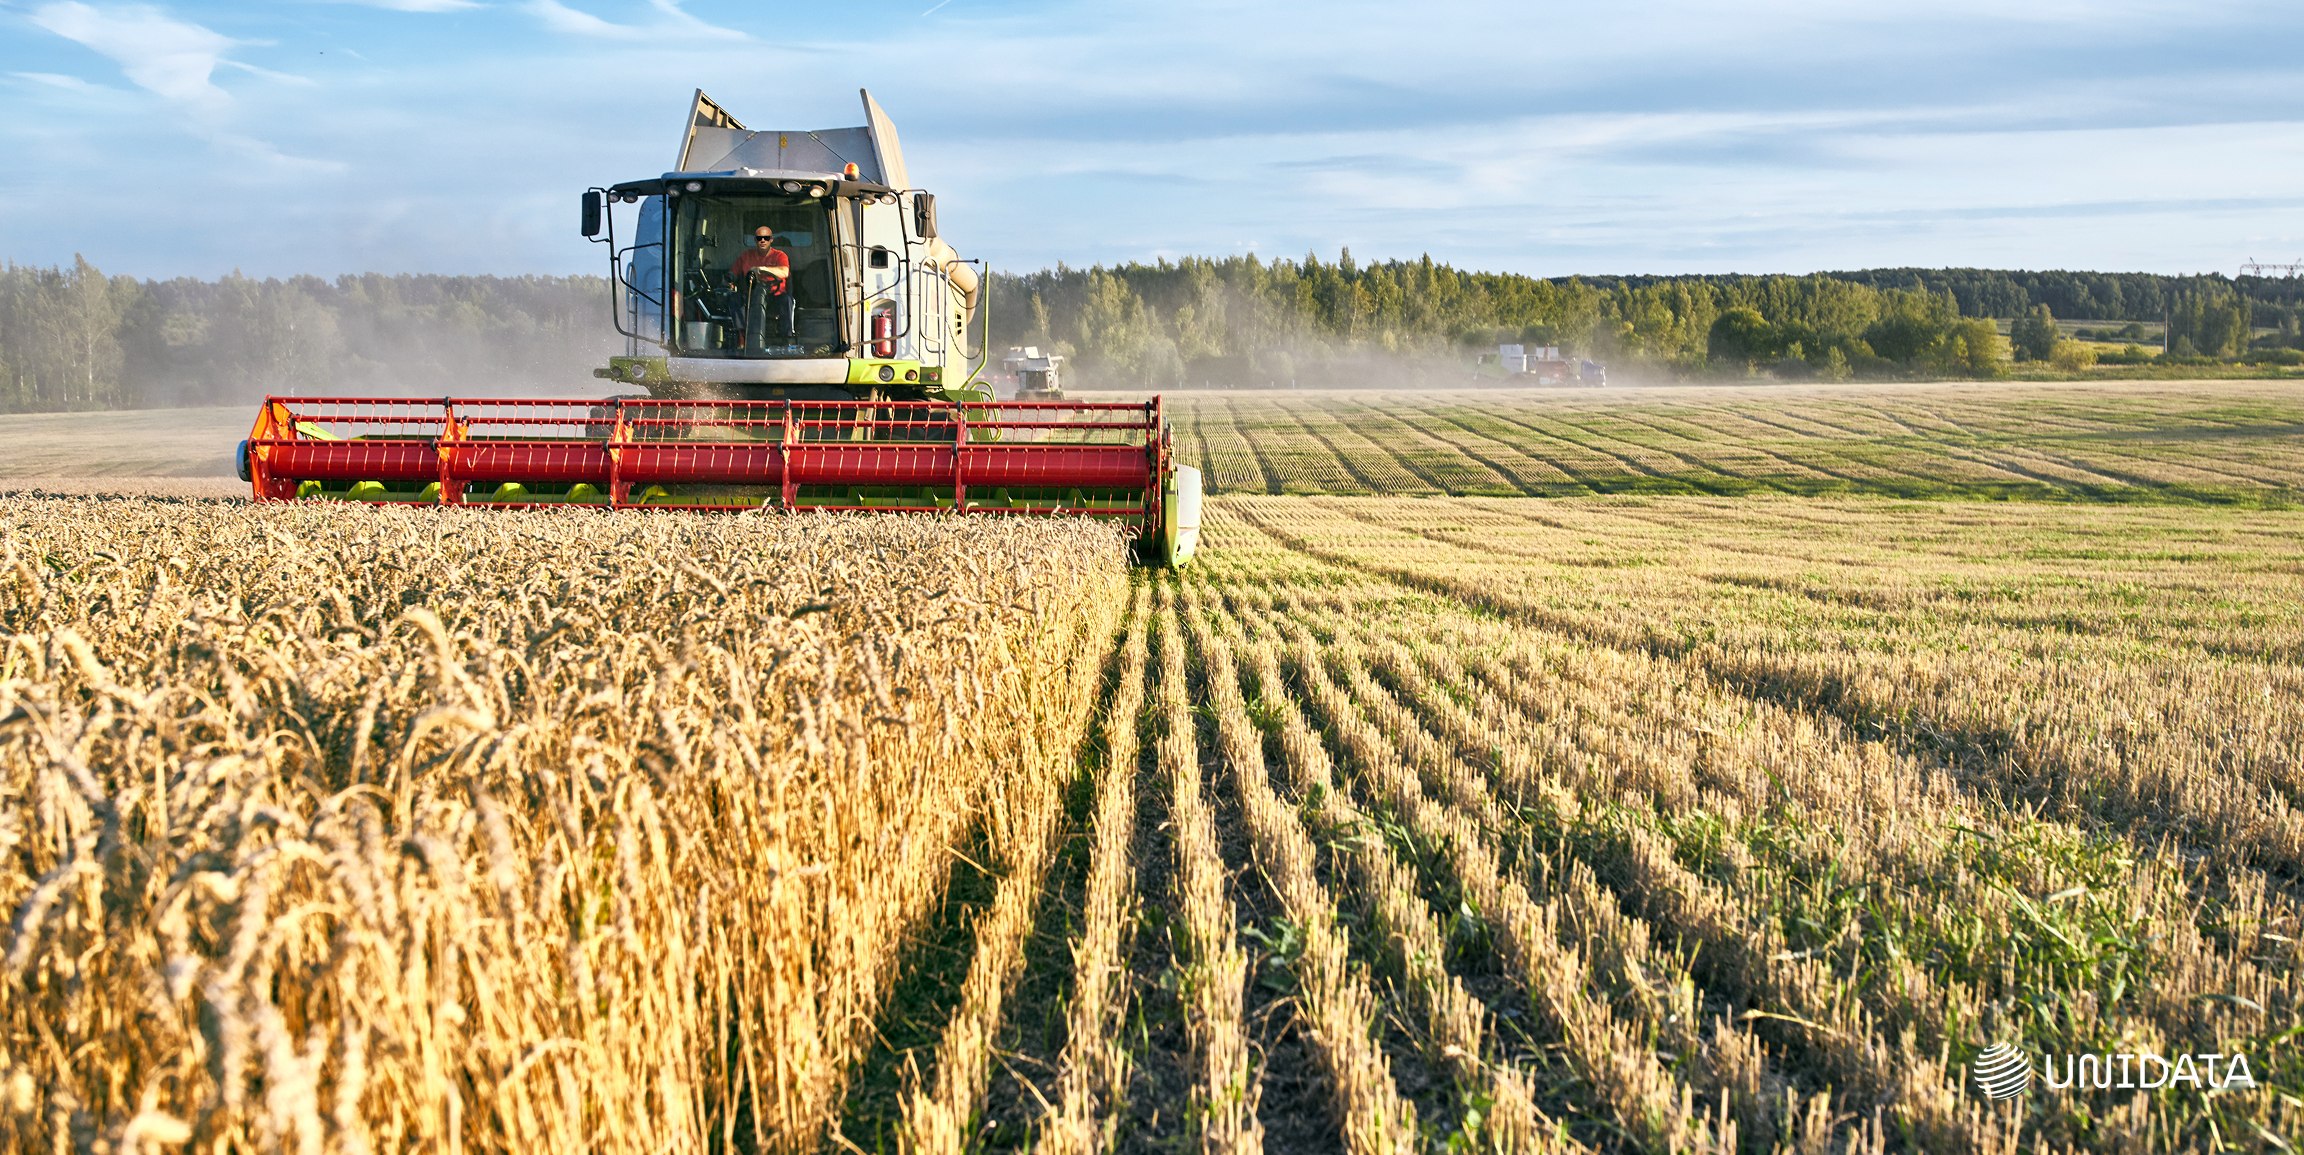
Agriculture is another frontier. Drones and smart cameras scan crops for signs of disease, pests, or drought stress. The model flags issues early, so farmers can act before damage spreads.
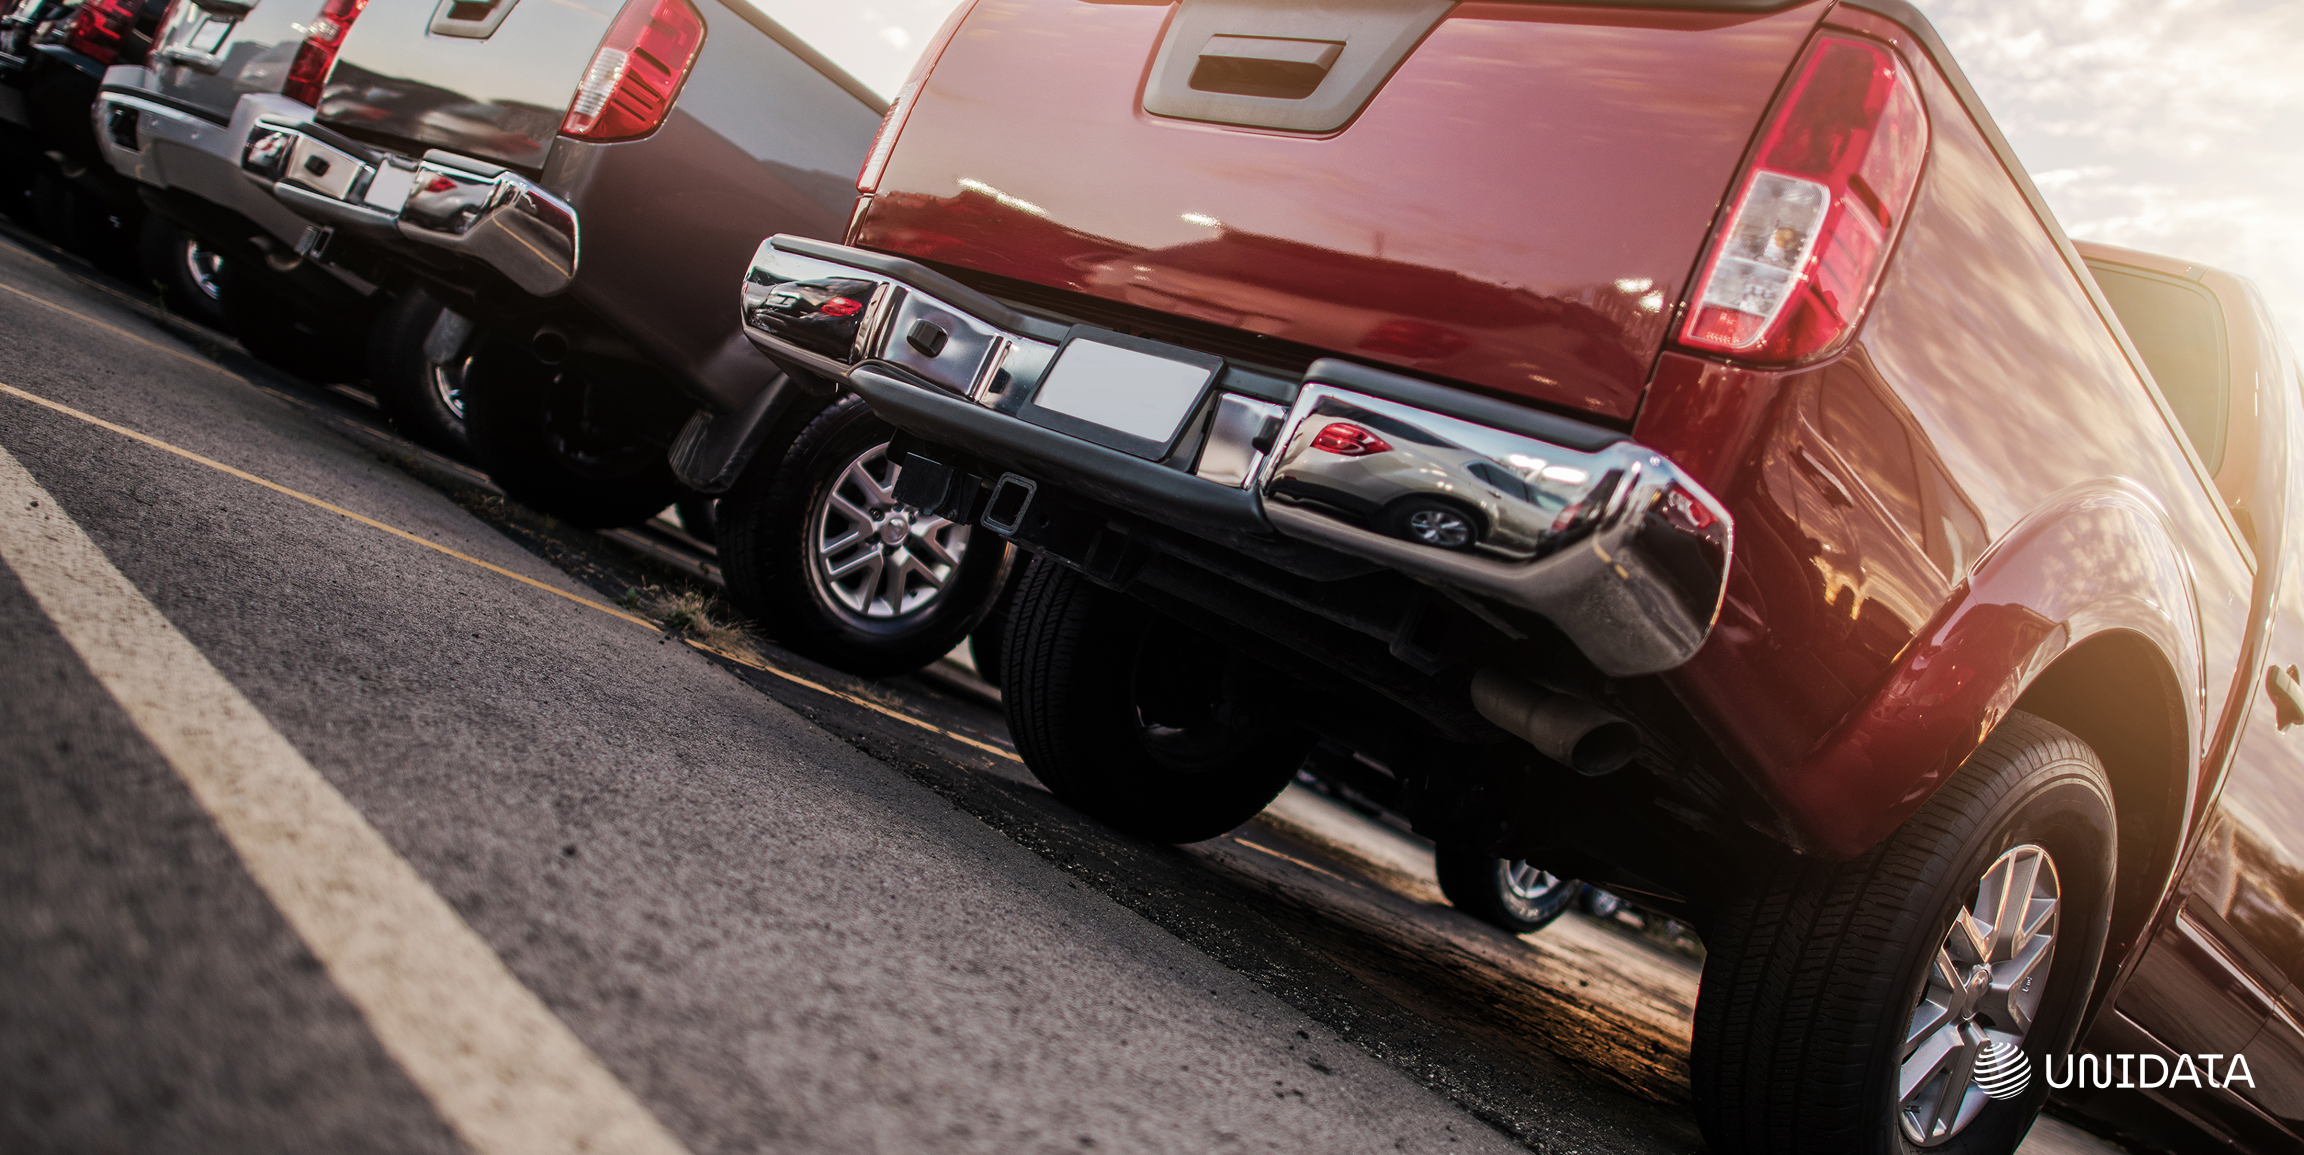
And in automotive, image recognition is the bedrock of driver-assist features. Lane tracking, pedestrian alerts, and parking automation all rely on rapid visual inference—often processed right on the car’s chip.
No matter the vertical, the pattern is the same: what was once manual, slow, and error-prone now happens in milliseconds, with far greater consistency.
Is It Worth the Money?
Building an image recognition system isn’t cheap. Between model development, data labeling, infrastructure, and integration, the costs add up quickly. So the real question is: does it pay off?
In many cases, yes—dramatically.
Factories that adopt automated defect detection report up to 40% fewer production errors and measurable drops in waste. Hospitals using AI-assisted imaging see faster diagnoses and more efficient triage. And in retail, visual systems reduce theft, track stock in real time, and improve checkout speed.
To make the case internally, companies often compare the cost of automation vs. the cost of doing nothing. Think:
- How many errors are we catching late?
- How much time do human reviewers spend each day?
- What’s the cost of a single recall or missed fraud?
Even a basic estimate like this can help teams justify the investment, especially when image recognition replaces repetitive visual tasks or enables round-the-clock monitoring.
What’s Coming Next
The next wave of image recognition isn’t just about sharper accuracy—it’s about broader context.
Instead of labeling static images, new systems are starting to understand motion, predict intent, and combine multiple modalities like text and video. Think of a security system that not only sees a person enter a room, but recognizes their gait, reads the badge, and links it to a past incident report—all in real time.
We’re also seeing a shift toward self-supervised learning—where models train themselves on raw, unlabeled image data. This means less reliance on manual annotation and faster ramp-up for domain-specific tasks.
On the deployment side, the push is toward lightweight, edge-ready architectures that work offline, on-device, and under tight compute budgets. That’s what will power smart helmets, wearables, and embedded sensors without calling the cloud.
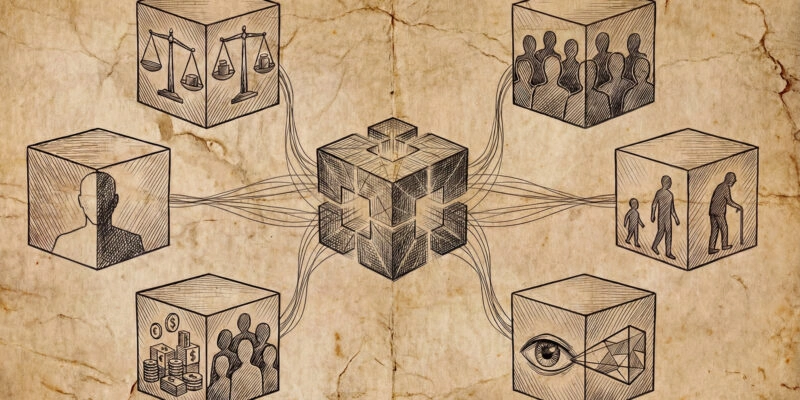
And of course, there’s the regulatory frontier. As image recognition shows up in more public-facing applications, pressure is mounting for transparency, bias mitigation, and ethical design.
One thing’s clear: the tech will keep evolving. The real question is whether businesses can keep up.
Frequently Asked Questions (FAQ)
Not necessarily. If you’re using a pretrained model and fine-tuning it on your specific task, a few hundred high-quality, well-labeled images can be enough. The key is relevance and variation—not just volume.
Classification tells you what’s in the image. Object detection tells you what’s where. If your system needs to spot multiple items—or locate them precisely—you’ll want detection, not just classification.
Yes, if it’s optimized for the edge. Lightweight or quantized models can run on phones, smart cameras, and embedded devices without hitting the cloud. Just be sure to test it under real-world conditions.
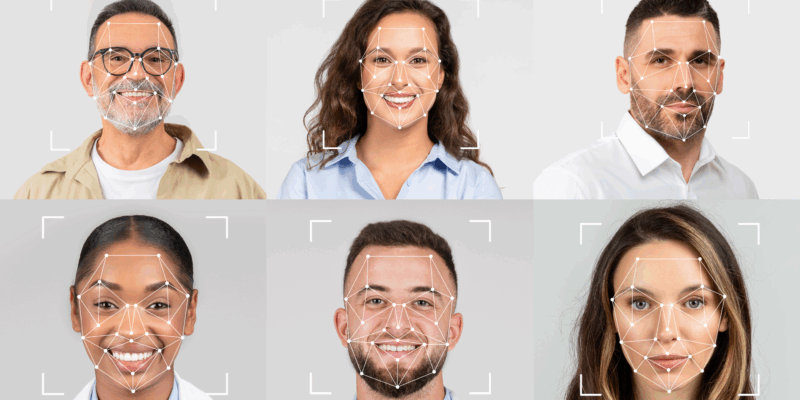
Start with diverse training data. Then evaluate performance across different groups (age, gender, background). If one segment underperforms, rebalance the data or retrain the model. Fairness isn’t optional—it’s foundational.
You’ve got a few paths. You can work with a professional annotation team, set up an internal labeling pipeline, or use semi-supervised learning to bootstrap. But don’t skip labeling—it’s where quality starts.